Showing posts with label workshop. Show all posts

Tuesday, October 22, 2024

Checkerboard Bag!

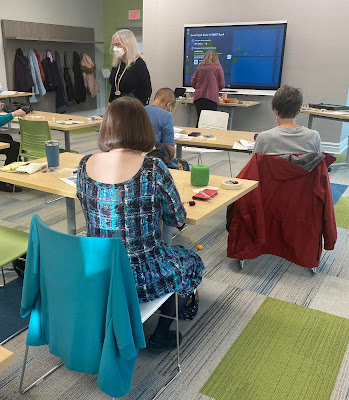
I had some fun over the last week, attending a bag making workshop put on my Garment Guild. One of our members instructed us on how to make a bag that's essentially a couple of rectangles and some tricky sewing! She had made many of these when she sold them in her craft business, and we had fun learning the trick for ourselves. 

We had to choose and bring along fabric and lining; I chose a canvas-like checkerboard that I bought from Our Social Fabric a while back, the perfect weight for a bag. I had the great luck of having some quilting cotton given to me by another participant for my lining because it looked so great! 

We inset a zip, made some straps, and stitched the shapes together. It was a bit orgami-ish but once turned right side out it looks so simple and fun! 

Inside out and ready to sew, it's a bit wild!

The great thing about this project is that it's a basic shape based pattern - the sizing depends on the zipper you use, and the strap length is up to you. It's very adaptable. Many people used two different fabrics for the top and bottom and this can give a great effect. I had such a busy print that I stuck with all the same but there were many beautiful combos shown, and they can be lightweight fabrics like batiks or even lighter if interfaced. Great way to use up scraps :) 

Friday, November 17, 2023

Beach Glass Quilting class


I had a busy workshop week with my local guilds! I also went to a class held by my Quilt Club, on the topic of beach glass quilting. 

It was an enjoyable afternoon & the subject was not too intimidating. It's basically a fused applique style, with the visual effect of beach glass (although as people at the class notes, you could adapt this technique for other effects as well). 


We had to bring along a bag of scraps, some fusible & a base fabric to work on. I don't have a lot of cotton scraps in my stash; most of mine are garment fabrics. But I put together what I could and headed off. Thank goodness there were piles of shared scraps, both from the instructor and other participants, because in the end about half of my 'pebbles' came from other people's scraps ;) 

Basically, we went through, chose a palette, laid out potential scraps, and then fused them down to pieces of Steam a Seam.


Then we could cut little shapes out of our chosen colours, and lay them out on our base fabric, until we were happy with the arrangement. Honestly this took the longest of all the steps! We had some photos of beach glass pieces to look at and that helped with colour choices and with the cutting out part -- it was all freehand and I found I had a tendency to make mine all teeny and blobby. I had to consciously try other shapes until I was happy with a mix of sizes and outlines. Once that was ready, you could fuse down your pieces to the base, and start outlining them in thread -- this necessitates a lot of spool changes, if you want to match colours.

I got a few done by end of class but have had to continue at home so that this doesn't become a UFO! Only two more to stitch down, and then the binding. I think I'm going to bind it in scrappy binding left over from the pieces I used, or maybe I'll just mat and frame it. We will see. It was an entertaining afternoon and I had a lot of fun with this one!


Tuesday, November 14, 2023

Learning About Dorset Buttons

This week my local Garment Guild held a workshop about how to make Dorset style buttons. I was really looking forward to it as I've always been interested in this technique. I really enjoyed the workshop but I was also surprised at how mentally taxing it was ;) 

The instructor was from the London chapter of the Canadian Embroidery Guild and was so informative and fun to learn from. We went over a brief history of thread buttons, made a classic Dorset button and a Death's Head wrapped button, and had a demo of the slightly more complicated Shirtwaist button. Just making two styles was intense! 

My Dorset Button!


I nearly finished my Dorset -- and as the instructor said, your first button is not going to be perfect! I'm planning on finishing it up with just a few more wraps. The Death's Head button was fiddly but I decided to use two colours, and since it looked pretty stark when it was done I added a couple of lazy daisy stitches to the centre. Totally not the way it should be done ;) 

Death's Head with embellishment


I love learning new things, and this is something I think I'll be exploring further. There are lots of fascinating links online, some shared in class and others that I've seen in my blog reading travels. Here are a few if you'd also like to explore! 

Needle n Thread

Henry's Buttons (UK)

Edmonton Needlecraft Guild 

Gina-B Silkworks