Showing posts with label twill. Show all posts

Tuesday, April 26, 2022

Burda Book Jacket

Well, I was fortunate enough to move on to the second round of the PatternReview Sewing Bee this year, and was also fortunate that I had the week off so I could work on my new assignment! I'm glad I did because it was a tough one. The brief was to create a garment in which the buttonholes were the feature -- not the buttons, but the buttonholes. Yikes! I was stumped at first.

I thought about it all the first day and came up with tons of different ideas, that were all rejected almost immediately. I researched various buttonhole techniques and ideas, and when I watched a Threads video on shaped buttonholes I was hit with the idea of making a "Book Jacket" - perfect for this librarian! It would feature open book shaped buttonholes. Once I had that thought I couldn't get rid of it, so spent most of the next day looking through my jacket & blazer patterns for a clean silhouette with buttons all the way up the front. Harder than you might think. 

But Burda came through for me again; I found the perfect pattern, 108 from 12/2021. It's a boxy style, and also had a coat variation (109). This was helpful because the collar on 109 had a wider gap at centre front, which I thought I'd need to accommodate my elaborate front buttonhole feature which required an extended placket to fit them on while keeping them centred on the centre front line. So I traced mostly 108, but 109's collar.

There are only 3 buttonholes, but laid out against the plain black jacket I think they stand out as the main feature. This is after all my Book Jacket, so my faced buttonholes shaped as an open book had to be the focus. To avoid disrupting the effect, I used the same text fabric for self-covered buttons (one of my favourite kind of buttons). While buttonholes for a jacket like this are usually horizontal, I had to switch mine to vertical to fit the book theme - the spine of the book becomes the buttonhole.


I made the buttonhole feature using a paper template I drew out, and was very careful to line the centres up with the centre front line. I don't always do a lot of thread tracing to mark centre front and button placement marks on a pattern, but I did here. On my samples I tried stitching the 'lips' to the facing to make a clean edged window, but I preferred the look of the topstitched window, as I felt it emphasized the book outline a little more. So that's what I did on the jacket. I put the buttonholes in on the right front pattern piece before I did anything else at all, in case I needed to recut the front and try again ;) Fortunately I didn't, so went ahead with construction.

I also decided to add in a little sleeve gusset at the wrist as a way to bring in the text fabric somewhere else in the garment. It's a little detail that shows when I'm moving.

I find the jacket comfortable and like it both done up and open -- I wasn't intending to ever wear it open, but the book effect still works when it's not buttoned up, and the counter effect of seeing the buttons separately actually adds to it, I think. I'm happy with the contrast between the black background and the book shaped buttonholes and text fabric. I enjoyed learning the shaped buttonhole technique and now have lots of ideas about how to use it in future projects.

Another element I liked about this project was that once again I was able to use stash fabrics & notions for the entire project, even if it meant I had to use two different types of lining for the body and the sleeves. 

The pattern included little patch pockets, but I didn't like them with this version - I was going for streamlined. So I didn't add them. I did shorten the sleeves (always) but not the body of the jacket. And my main change to the pattern (besides the buttonholes of course) was to extend the placket on the right side by 1/2" to accommodate the size of the book buttonholes. This was a cute pattern even with a few small issues with the instructions - it all worked out and I'm very pleased with this little jacket. The Sewing Bee really forced me to think about buttonholes in a new way! 


Wednesday, January 12, 2022

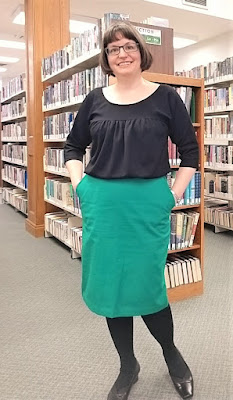
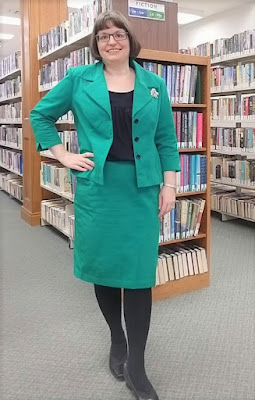
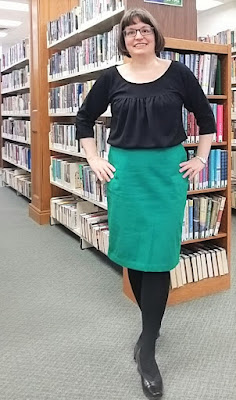
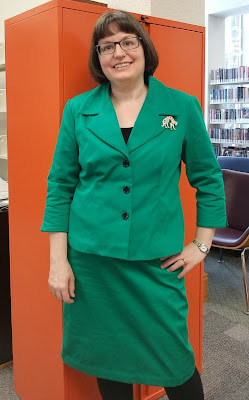
Green Burda Skirt for a Suit

When I made my recent New Look 6159 green blazer, I always intended to make a matching skirt, inspired by Dior's spring 2022 show. So I got to work right away this year and tried on my new blazer with at least 5 different skirts from my closet to determine which skirt would be the most complementary to the jacket. I decided that this Burda 109-11-2019 was the best match for it, so quickly cut it out and started sewing.

I've made this pattern twice since October so felt quite comfortable sewing it up quickly. I repeated all the adjustments I made when I sewed up my last version, the checkerboard skirt that is still waiting for its matching jacket. The only difference is that I made this green version one inch shorter. I prefer it in this length so I've just created more work for myself - now I want to shorten the original checkerboard version too! 

I left off the D-Ring feature at the waistband that makes this skirt distinctive, but I felt that it would match with the jacket better without them. Again, the cut on pockets are amazing and I love the fit now that I've got the sizing adjusted. 

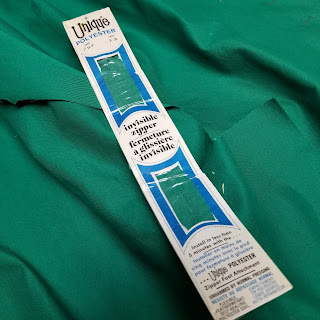
I happened to find a vintage invisible zip in my stash in "Jade", almost the exact colour of the skirt. And I finished off the waistband with an invisible skirt hook and eye rather than a button. It's very sleek and clean, and I like it that way. 

I used a remnant of plain cream lining rather than matching the polka dot lining of the jacket, just because the dot lining is a bit staticky and this leftover bemberg lining is not. It all seems to go together to my eye, and I'm very pleased with it! The fabric is prone to creasing though - you can tell in these pics which were taken after wearing the outfit for a few hours.


I'm working on a black blouse to wear under it, and already have my eye on some textured yellow cotton in my stash for another bright skirt suit. I'm afraid this is going to be addictive!

Tuesday, January 4, 2022

New Look 6159 in Dior Green


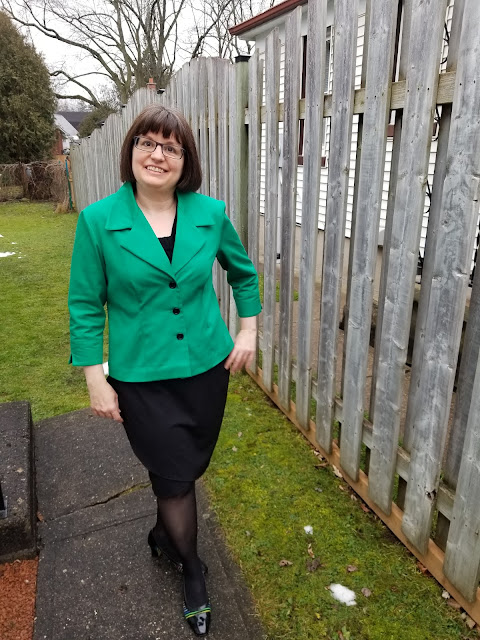
For most of December I was working on this green twill blazer, New Look 6159, for the #DesigningInDecember challenge (where you might still be able to vote for your favourites!). And also because it was on my sewing list as part of the Bold Playful Power Suit theme I created this fall.  This jacket was also inspired by the Dior Spring 22 show, all those bright skirt suits! 


I've never made a real blazer before so this was a learning experience. A real learning experience, as it turned into a bit of a comedy of errors with so many things going wrong right from the start. I got the pattern adjustments made and cut this out, then realized that I had somehow lost the second sheet of instructions for the pattern -- I have never lost anything from a pattern before. The instructions that I had stopped at the point where the lining was just starting to be constructed. Fortunately, I had this great book on linings in my stash, which gave me what I needed to get the lining in, alongside another book on tailoring that I'll talk about later on this month. 

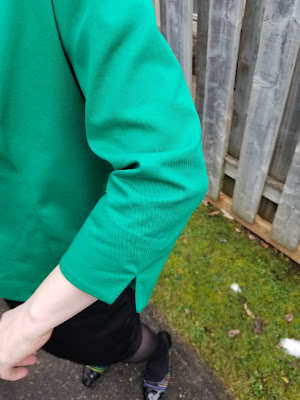
I had a bit of difficulty getting the sleeves set in, which I normally don't have trouble with. I think that this fabric is a little sturdier and harder to smoothly gather, which added to the issue. I unpicked both sleeves at least three times before deciding that it was just good enough. When I got to the lining, which nobody will ever see, both sleeves set in perfectly the first time, smoothly gathered and with underarm and shoulder seams matched exactly. Sigh. I did shorten the sleeves slightly, since my arms are short, and I wanted this to remain 3/4 length. They are finished with a nice notched cuff which can be left down or folded up; it's a nice detail. 


This fabric resisted easy pressing as well, and I'm not 100% happy with the darts. They aren't terrible but could be better. The collar though, whew, that was tough! The point where the edges meet in that notch just wouldn't join easily. I unpicked both sides at least 3 times as well, and restitched carefully, turning it to see what it looked like. Finally, again I got to the 'good enough' stage, and just steamed the heck out of the collar at the end. It's actually the bit I'm most pleased with now. 


I chose a confetti print poly lining from my stash - a little more staticky than I like for a lining usually but I've had it a long time and couldn't resist the visual match. As noted that went together beautifully and sewed in with no issues at all. The pattern does include an ease pleat at the centre back so I didn't have to add one in.

It's actually quite a decent pattern; everything matched up as it should and I didn't have to do any extreme fitting. I did my usual length adjustments and then graded from 14 shoulder to 16 bust and 18 hip, quite common for me. The only unusual adjustment was that after shortening it above the bust and again above the waist, I added on 1.5" at the hem because I felt it was a little too cropped for my tastes. And I had to drop the dart points by 2" each. Also, when I tried the outer jacket on prior to adding lining, I thought that a 1/4" shoulder pad would improve the look of the fit, and it did. Good thing I had some in my stash ;) 


I finished it off with black buttons, inspired by Dior. That was another fun moment - I thrifted these perfect buttons and had carefully kept them on my table for this point in the process, and then couldn't find them when the buttonholes were to be put in. I was trying to finish this by deadline, and it was the afternoon of Dec 31 and there I was wasting time, turning everything over trying to figure out where the buttons could have got to. I finally uncovered them (under a stray pattern piece) and thankfully the buttonholes went in like a charm (I got to use my new buttonhole chisel!) and I stitched on these black buttons and still got to take pictures in the outdoor light. Yes, it was warm enough here on Dec. 31 that I could stand in the yard for these photos! 

I'm still planning on making a matching green skirt so that I can really knock off that Dior set. More on that later! For now, I'm relieved that I had the time to really work on this one and get it done despite all the problems I had with it. Hopefully next time I'll know a bit more and it won't take as long to make my next blazer :)