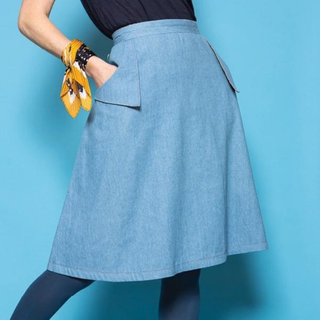
Showing posts with label skirts. Show all posts

Friday, December 6, 2024

Basic Black with Burda

November brought a new contest challenge over at PatternReview, the Mini Wardrobe challenge, in which you were to make 5 coordinating items in 5 weeks. I was thinking about it for a while, and realized it would be very unlikely for me to make that many things in such a short time frame. However, I did put together some fun ideas, the initial one being the Merchant & Mills Factory top that I just shared. The whole concept was built from that piece. 

I thought of making a red blouse, a cream sweater or jacket, and a black skirt to go with it, and maybe a fun print dress. Of course I just finished the top, but now have completed the black skirt. The other projects will have to have their turn another day ;) 

But I am very pleased with the black skirt that I chose for this outfit. I had just enough black twill left from another project to make a new Burda pattern - I used #117 from the Dec 2022 issue. This skirt has everything I like - slash pockets, a waistband that sits at the natural waist, and a lining. I was able to make the whole skirt from fabric from my stash, which was an added bonus. I realized after I'd cut the waistband that I added seam allowance to it, as with all the other pattern pieces - but the waistband is a rectangle that already includes S.A. so I had an extra wide and long piece. But this worked out in my favour! 

The front of the skirt has two pleats on each side, just before the pocket openings. This is quite nice. I did find the pocket bags a little shallow and will extend them if I make this again; I like to be sure my keys aren't going to fall out. 

The zip closure is at centre back, and is supposed to be a 9" invisible zip that goes up to the top of the waistband. I find that messy sometimes, though, so I used the 8" zip that I had and inserted in only in the skirt piece. 

This is where the excess waistband came into play. Because my waistband had extra length, I was then able to create a 2" underlap on the left side, and add a skirt hook and eye. I prefer this closure over trying to force a zip up past a bulky seam. Plus I like to add the waistband after the skirt and lining are sewn/basted together, as I find it's a much neater finish, for me. It worked out perfectly but I do find in wearing that the back is a little tight and so I have wrinkles - should have added another inch to the back width. Still wearable though, especially if I iron it before taking pictures ;) 

I also lengthened it by 2" but because there is a slight A-line shape to it, I didn't have to add a walking slit to the back (the shorter length wouldn't need it so there wasn't one in the pattern). I actually love this skirt a lot and would definitely make iy again. I love the way it fits (slightly higher waisted to work with shorter tops like my Factory top) and the pocket/pleat combo sits really nicely on the body, no puffy bulges to worry about ;) I can always use a basic black skirt, and this pattern might just be my new winner. It's comfortable, pretty easy to sew, and I like the details. Very happy with it. 


Sunday, July 9, 2023

Weekend Review: Your Skirt, Your Way


Your Skirt, Your Way / Jenniffer Taylor
Search Press, c2020.
128 p.


This is another book by a former Great British Sewing Bee contestant. It's the second book by Jenniffer Taylor, whose first book, Girl With a Sewing Machine, was published in 2020 shortly after her GBSB appearance. 

This book is a really interesting one for adventurous beginners, or those more accomplished sewists who want to create their own block to then make into a variety of skirts. There are 10 distinct skirts included in the book for readers to create.

The book starts with an intro, recommending necessary tools and basics, then moves into how to create your block based on your measurements. This section includes how to measure, how to draw out a block and how to create a toile to check fit. 

Then the following sections cover six shapes of skirt, waistbands, facings, zips and buttons, and then a section on pockets, yokes, hems and vents. There is a lot of info for sewists to use here. 

The final 40 pages are the actual skirt "recipes", as she calls them. They are not quite patterns, but the instructions about how to make the pattern based on your block -- and then how to construct them. I think there are many options here, with a style to suit every reader. And the details are cute too - I love the pockets on the flared Kate skirt.


I thought that this book was really well done, at just the right level for an ambitious beginner, straightforward but not overly simple. Skirts are a great starter project, and are also a good way to take a stab at pattern making. There is solid instruction, lots of photos, and some creative yet very wearable projects in this book -- a winner. 


Thursday, May 18, 2023

Skirt Repair for Continued Wear

Happy Vyshyvanka Day! 
Mine worn with my re-hemmed red skirt

I've had a number of skirts sitting in my mending pile for a while now. This MeMadeMay I decided that I'd focus on looking at my wardrobe, seeing what I enjoy wearing, and also fix some of those pieces that are patiently waiting to be worn again! 

The skirts I've worked on all had minor issues - needing to be rehemmed, bottoms of zips fixed, etc. Nothing hugely construction heavy. And yet they were all languishing. So I grabbed a few of the easy ones and got to work! 

First was this grey skirt from the famed Vogue 1247. The fabric around the zip was weakening slightly, and it wasn't very invisible to begin with - it's an early make. So I simply restitched it closer to the zipper tape to make it more invisible and to reinforce that pulled fabric. It worked just great. 

Before

After

Then I shortened a red knit skirt that I made last year - it's just the wrong length, both too long and too short to be either effectively! So I cut off the current hem and just folded it up again so that it sits at the knee rather than under it. I like this much better. 

Too long and too short and the same time!

Cutting off an inch

I haven't worn this black and white skirt, Simplicity 4236, much since making it in 2014. I put a pocket into one side but it never sits properly. Even though I am staunchly behind adding pockets to everything, this one just doesn't work, so I gritted my teeth and removed this one! It does lie much more smoothly across the hip now, and I think I may wear it again! 

Original


Depocketed!

I still have to shorten and narrow this blue skirt slightly (also a Vogue 1247) 


and make the walking slit in this magenta skirt much longer (and add a modesty panel at the same time - I saw a recent tutorial on adding a Dior pleat to a skirt, and I'll be adapting that here.)


But those are a little more involved so will take a bit longer -- still planning on having them done by the end of MeMadeMay though! 

Wednesday, March 15, 2023

Sweater Knit Skirt with Butterick 6525

After I made my Burda sweater recently, I had enough fabric left over to cut out a skirt. I didn't want to waste any of this fabric, so before putting the fabric away I found a suitable skirt pattern to try out! 

I have had Butterick 6525 in my stash for a while; I bought it for the dress view. However, the skirt included is a quick pull-on, elastic waist style, which was also just the right size for my leftovers. So I cut it out, with a few alterations. 

I didn't really like the hemline style -- so I left the hem straight but marked the curved lines on the fabric in case I changed my mind and wanted to follow them. Once it was done I really liked the straight hem so pulled out my thread markings and left it plain. 

I also used only one piece of 1/2" wide elastic at the waist instead of making two narrow channels. This fabric was just a little too squidgy to easily sew two neat channels and I didn't feel like futzing around too much! 

And then I also added some side seam pockets. Of course! I cut the pockets out of some black broadcloth, and made sure that the tops of the pocket bags were secured into the stitching when I folded the waist casing down. That way they are anchored neatly and always stay put in the front of the skirt. 

This is a very basic skirt, and I've made it even more basic by leaving out the hem detail. However, I really like the fit, and the gathering is just the right amount, not too bulky at all. It's very comfy and cozy -- I just hope there isn't too much stretching out of shape as it's worn. Sweater knit isn't really known for its recovery. Still, I thought I'd give it a try and get another wardrobe item out of this fabric. I'm pleased with it and think this will get a fair amount of wear. Now to make the other items in this pattern!


Tuesday, February 21, 2023

Red Remnant Skirt


I have been trying to use up my stash as much as possible in my recent sewing. And after I finished the red ponte dress for the Sewing Bee, I found I still had just over a metre of this fabric left. I didn't want to put it back into the stash to languish, so I decided to make a basic knit skirt to use most of it up. 

I chose New Look 6977, as I've made it previously and have worn it quite a bit. I like a good pull-on skirt that you can feel comfy in! I made it with the same addition as the last time I made it -- I added side seam pockets. I used some black broadcloth, and anchored the pocket bags into the waist seam. This time I followed the pattern and just inserted a thinner piece of elastic into the wide waistband rather than stitching one down; that just makes it easier to alter in future. 

I really like the fit of this skirt. It sits comfortably and securely at the waist, but also skims over the hip/butt area fairly well. This fabric is soft and stretchy, and it's a colour that goes with a lot that I have in my wardrobe. I was pleased with the way this went together without much struggle, and now I have one less piece of remnant knit in my stash, and one more useful basic skirt in the closet. This wardrobe pattern has a lot of good options, and I do recommend it if you can find it. 

Thursday, December 8, 2022

Garibaldi Skirt in vintage cotton

As mentioned previously on this blog, I'm one of the members of the Liesl & Co. Advisor's Circle this year. So, every now and then I take one of their patterns and make something with a bit of a twist to it. One of the new Fall patterns is an A-line skirt with 3 length options, a waistband or facing option, and some wonderful deep pockets, even with a side zip. It's called the Garibaldi Skirt, and it's my latest project! If you want to check out the original post on Liesl's blog, you can find that here.

So I decided to finally use a piece of fabric I've had for ages; my aunt gave it to me years ago (probably about 20 years!), found somewhere on one of her many travels. It's long and narrow, with this large print along one side. I knew I'd have to use it crossgrain to use the pattern but didn't have a clear vision for it. But this pattern suddenly made me remember this fabric and I knew it would be perfect.


The Garibaldi has no front or back seam to break up a print – the zipper is in the side seam. But unlike many skirts with a side zip, this one also has pockets, a must-have for me! The pattern pieces fit onto the print perfectly, with just a bit of care to get the pattern placement right. But because I am so short, I didn’t get much of the solid black at the top of the fabric. But the knee-length version was the one that suited me so I went with it.

I used a vintage invisible zip from my stash (the first one I’ve ever seen that has metal teeth!). This zip was only 9″ long, while the pattern calls for a 12-14″ one. To give myself more room, I installed the zip only on the skirt portion, not into the waistband as the pattern directs. I then stitched a large hook and eye onto the waistband portion. If I'd thought ahead a bit more, I might have added some overlap to the waistband and put a button in, but this works!

The other change I made was to add a lining. This fabric is a fairly lightweight cotton, and it sticks to itself very easily. I thought a lining would solve any issues with bunching as you walk and also add some body to the fabric. I used some basic black lining and just cut the front and back pieces of the skirt from the pattern. I sewed this on in my favorite way to line a skirt – I stitched the lining to the zipper opening, then flipped it inside and basted around the waistband. I then sewed the waistband on and hand-stitched down the inside of the waistband. It might take a little longer, but I really like the control I have when I do it this way, and the finish is very clean and neat.

I love the fit of the skirt. I didn’t have to adjust the pattern much once I’d chosen my size according to the pattern; sometimes, I find skirts hard to fit with my hip/waist ratio, but this was perfect. There are two small darts in the back for shaping and somehow it all worked for me. I love the waistband version (there is also a waist-facing option), and the pockets are just right, nice, and deep. I’m so pleased to have found the perfect pattern for this admittedly unusual fabric.


Tuesday, October 19, 2021

Burda D-Ring Pencil Skirt in Basic Black


My last project for the PatternReview mini wardrobe was this Burda skirt from 2019. It's a blend of pattern 109 & 110 from the November issue -- the length & back vent of 109 but the D-ring feature from 110. It was also my muslin for my intended fabric, a checkerboard canvas print, which I am planning to also make a matching jacket for because who doesn't want a checkerboard suit?

Anyhow, this first black version was made of some suiting that I thrifted a while ago, very nice quality. I cut a 44, but found that I needed to take the waist in by nearly 3" -- partly because I can't stand skirts that sit below the natural waistline. Size 44 fit very well everywhere else so just narrowing the waist was the main adjustment I made. I trimmed down the side seams by 1/2" on each side and took some width in on either side of the zip. For future, I adjusted the pattern so that the back width is reduced by increasing the dart intake, not trimming the zip edges! 

It's fully lined, and the Burda instructions have you attach the lining to the other edge of the folded waistband, flip it all inside and then topstitch the waistband seam from the front to finish. I hate that; it is so messy and frustrating! Next time I'm just going to use my favoured technique of basting the lining to the skirt at the top edge, then attaching the waistband. Much tidier in the end, at least for me. It just means you have to think ahead about finishing the lining edge at the zip, but that's pretty easy. 

But as a wearable muslin it worked out, and I love the cute little D-Ring accent in the front. Those are just tabs that you sew into the waistband but they give it a great look. Again, slant pockets, which I love. I really like the shape and fit of this pattern and think that with my adjustments it might be a go-to. 


Friday, May 28, 2021

Summer Capsule Wardrobe plans

I've been feeling more and more intrigued by the idea of capsule wardrobes, although I still think I'm rather more of a maximalist and like having lots of variety and standalone prints in my wardrobe. Still, thinking of sewing in capsules appeals to me. 

I've looked at some capsule planning guides, like the Canadian Capsule Planner by Couturious and the Mood Capsule Creator planning guide. Both are free, and downloadable and printable if you are also interested. They both gave me some really good ideas. 

And of course I've been playing with MyBodyModel since I first got my croquis back in March. So I decided to make a plan for next month's sewing using a capsule framework combined with the MyBodyModel 3x3 technique. 

I took a piece I just made, the Adrienne Blouse, as the keystone of this one, and looked at some of the other patterns and fabrics I've been wanting to make. Here is my plan, which I think is doable, to get some matching options in my wardrobe for the summer. 

I'm adding two more tops, a McCalls 4591 (a thrifted pattern c.2004) and the Edith Blouse by Maria Denmark. Both of these are stash fabrics, although I bought the fabric with the Edith Blouse in mind at least 3 years ago! Where does time go?? (But isn't this fabric fantastic?)

And I'm going to try out the Peppermint Pocket Skirt, a community hit, in a brick coloured linen that tones with all three tops. I'm going to add a fitted knit skirt (Pirate Pencil Skirt), and a pair of wide leg cropped pants from Vogue 9364 - both in black - for good measure. 


Well, at least that's the plan! I also have a big stack of dresses I want to make this summer, and with those I don't worry about matching with anything else :) I may want to make a couple of lightweight cropped summer jackets to go with the dresses but that's about as much matching as I worry about there. Dresses are a great way to be fully dressed without having to coordinate anything further than my shoes, so I love to use my bright prints and novelty fabrics for my multitude of dresses. 

Are you more into capsule planning or mood sewing? I haven't really been a plan maker in the past, usually just looking at my fabric and deciding what I wanted to make next by feel. But I'm kind of enjoying the sketching and fabric matching process, and while I don't think I'll ever plan every single make, I'm finding it fun and helpful to whittle down my huge mental queue of things I want to make into a reasonable month-at-a-time plan. I will always have more that I want to sew than time available to do it -- but this is a great process to prioritize things I need most in my wardrobe. 


Tuesday, February 2, 2021

February Brings #BHMPD


I love the Black History Month Pattern Designers Challenge! It's such a great idea -- highlighting Black designers, pattern makers and sewing business owners in a fun and relaxed challenge. 

This year, #BHMPD is being hosted by @SewNaturalDane and @Island Sewcialist It happens mostly over on Instagram, and they've been sharing all sorts of suggestions for companies and designers to follow. The challenge is really just to make something by a Black pattern designer during February and share it with the hashtags, tagging the hosts too. They even have pattern discount codes and sponsor prizes, too. So be sure to check it out. 

I've participated the last two years, with patterns from my stash. In 2020 I made Simplicity 2230, a Khaliah Ali blouse pattern. And in 2019 I made McCalls 7251, a Tracy Reese "Plenty" blouse design. 

This year I'm planning on making something new to me, the Agnes Pencil Skirt by Michelle Sews. I love a good pencil skirt and have been looking for one with pockets for ages. This skirt looks like exactly what I've been searching for.

There is also a nice set of sewalong posts on Michelle's blog, which should also be helpful! I'm planning on making it in this heavy cotton sateen with a touch of stretch which has been in my stash for a long time. 


If I finish and have enough time I might make a top to go with it, probably one from my numerous Khaliah Ali Simplicity patterns. 

I'd use black, not this print, to make a complementary top

I recommend taking a look at this challenge and all the great resources shared around it. Lots to explore and learn! 

Tuesday, June 9, 2020

Grey Checked Button-Front Skirt

I've been taking some time this week to follow the Black Lives Matter events and posts, and look into some learning opportunities, and some organizations that may need support. I will be continuing to do so as part of my daily life, and will always support anti-racist groups and activities.

This is my sewing blog, so I'll be returning to mainly talking about sewing, but I'll also be remembering that anti-racism is more than just a one week flash, it's a lifelong practice. And so I'll be examining how I share and do my best to keep these issues current as I blog, even about my sewing.

*****************************************************************


And now for the second project I made using the grey checked cotton I made my first Cielo from! I thought that this fabric would be perfect for a button front 80s/90s inspired skirt like the patterns I've been seeing everywhere lately.


So I went back to the source, a 1992 pattern in my stash, Butterick 6222. This is a wardrobe pattern which includes a pleated/gathered button front skirt among other items (including an interestingly seamed cami top).


Like other patterns from this era, the waist is quite small. I had to add 2.5" to the waistband, but found that it came out a smidge too big -- I didn't account for some fabric stretch, I guess. I only had access to buttons in my stash when making this, and found these clear ones that I think look good on this fabric, but my buttonholer didn't like them much and I find that the buttonholes are a bit bigger than ideal. It still works fine, it's just the waistband button with its extra stress that shifts a bit. I added a snap to the waistband button overlap to keep it a little less shifty.


There were no pockets in this pattern -- bonkers, as a full skirt is the perfect place to hide some side seam pockets. So I added some, using a very lightweight poly from my stash (an old microfibre sheet I thrifted and use for things like this).


I like it, but remember now why I don't really wear this style of skirt much any more -- I used to wear this style ALL the time in the late 80s/90s. There is a lot of volume, and my height and pear shape don't exactly work with this style the way I'd hoped. But it's a comfortable wear, and when I took the pictures in the evening of a hot day, I found that this fabric is so very cool.


I can wear it with a matching top for a real 80s throwback - boxy top and full long skirt -- or with a much less voluminous top like the black linen tank top from New Look 6035 that I made about 6 years ago now!


I only had a smidge of trouble with this one -- I somehow put in a buttonhole near the top in the wrong spot, closer to button four than button two! And I had already cut it before I noticed. I decided to try a spot of mending, and unpicked the buttonhole, fused the edges to the facing and then 'darned' it with a mix of white and grey threads. You can't notice it unless you're looking for it, so I think it worked. I'm quite pleased that I now have symmetrical buttons, after restitching the buttonhole in the correct spot. Just when you've think you've made every possible sewing error, another one pops up! Always a journey.