Showing posts with label skirt. Show all posts

Tuesday, March 28, 2023

Floral Set for Fabricville


My latest project for the Fabricville blog is a little different for me - instead of a dress, I made a two piece matching outfit! Now I have separates that I can wear together for the dress feeling, or break apart to wear in other combos. 

I saw this floral rayon online at Fabricville, but the online image was a bit deceiving -- it looked like it was all floral stripes, but when I received it, the stripes ran along either selvedge edge with the centre more of an open floral. If I would have looked more closely at all the images, I could have seen this ahead of time - but I didn't.  Fortunately the print and colours are very cohesive, but it did mean that I had to make some decisions about how to lay out my pattern and how to use the print effectively. I didn't want the wide band of stripes running horizontally at the bottom of the blouse so I held the fabric up to me and asked for some opinions and finally decided that the stripes would run vertically down the right side of the outfit. I usually tend to put decorative elements on the left so it surprised me that this just looked better to have the stripe feature on the right! 

This is a rayon voile, and it's very lightweight and shifty. It is super soft and smooth, and the colours are so wonderful bright and deep against the dark navy background. But it was tricky to cut since it is so slippery and light. I got it cut fairly well, but I am glad that the busy print hides any mild mismatches! 

The blouse, Butterick 6731, was not a complicated project. And I only made a few minor changes. I shortened the body by 1/2", but did not shorten the sleeves at all. I raised the point of the V-neck as I thought it would fall a little low on me, and I'm glad I did. I also narrowed the centre of the neckline and the centre back by 1/4" each. The biggest changes were with the back darts - I found them extremely long so pinned them in to test it out, as I did not think this fabric would appreciate any stitch unpicking. I ended up shortening the upper point by one inch and raising the lower points by 4 inches - I wanted to leave more room across my butt ;)  I then shifted the dart centre to just under halfway between, a touch closer to the lower point. That pulled in the excess across my back but left lots of movement across the hips. Because of this, I also omitted the side zip. I basted the side seam and tried it on to see if it would go on without a zip and it was very easy to do as long as I had the front ties untied. All in all, it took some fiddling but I really love it. It fits nicely and is a super soft and comfortable fabric to wear. 

I added a lightly gathered skirt, using a pattern from my stash, Simplicity 1542 (a pattern I actually bought for the jackets). I thought this skirt had the right shape to go with the blouse. I had to alter this as well; first to add some length to it (3.5") and secondly, recutting the waistband as it is designed to sit 1.5" below the natural waist. I prefer my skirts at my natural waist so altered it to fit at that spot rather than below.

I added a side seam pocket to the right side of the skirt as well - the left has the zip so I didn't bother fussing around with that. I'm right handed so the right pocket is the main one I use anyhow! I was grumbling about the wobbliness of the fabric while cutting and sewing, but I love how it turned out and think this will be a very wearable set. 

Tuesday, June 28, 2022

Sheet To Simplicity 9115

I have been working on an outfit based on Simplicity 9115 - the whole outfit worn by the model on the front on the envelope. And I'm using a great piece of fabric; a thrifted 100% cotton sheet that I bought because the colour and the weave were irresistible. 

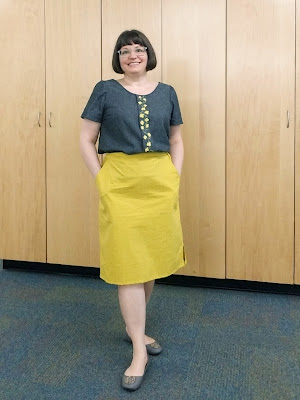
So far I have finished the skirt. This appealed to me because it's a quick and easy pull on skirt, with an elasticated waist that has a flat front and large "poche Italienne", my favourite kind of pocket.

This cotton is crisp but not too stiff, it still has some drape and it gathers well. That's important for a skirt with an elastic waist! This skirt also has a small walking slit in the left seam; I reduced the height of it by an inch since my legs are so short, and found it just right. 

I found this a very easy project - it went together well, all notches matched and it was straightforward straight seam sewing. I loved the way the casing is just bigger than the 1" elastic for the waistband. It was easy to install and makes a nice neat waist. 

This skirt will fit perfectly into my wardrobe; I've already tried it on with four tops I already own and it matches them all. And when I finish the tunic from this pattern, I'll have even more to wear with it! I really love it with this grey Sorbetto that I embroidered, though - the yellows are a perfect match. 


I'm really happy with the fit and comfort of this easy make, one more element in my 2022 Blue and Yellow sewing plan. 


Wednesday, January 12, 2022

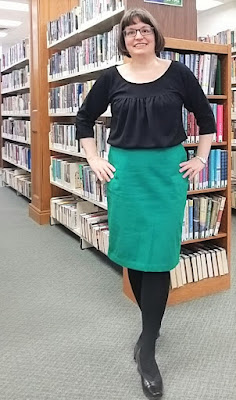
Green Burda Skirt for a Suit

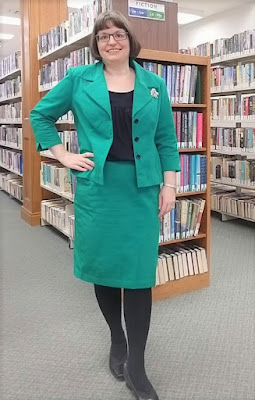
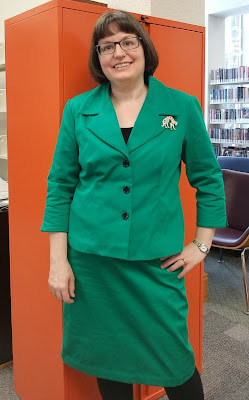
When I made my recent New Look 6159 green blazer, I always intended to make a matching skirt, inspired by Dior's spring 2022 show. So I got to work right away this year and tried on my new blazer with at least 5 different skirts from my closet to determine which skirt would be the most complementary to the jacket. I decided that this Burda 109-11-2019 was the best match for it, so quickly cut it out and started sewing.

I've made this pattern twice since October so felt quite comfortable sewing it up quickly. I repeated all the adjustments I made when I sewed up my last version, the checkerboard skirt that is still waiting for its matching jacket. The only difference is that I made this green version one inch shorter. I prefer it in this length so I've just created more work for myself - now I want to shorten the original checkerboard version too! 

I left off the D-Ring feature at the waistband that makes this skirt distinctive, but I felt that it would match with the jacket better without them. Again, the cut on pockets are amazing and I love the fit now that I've got the sizing adjusted. 

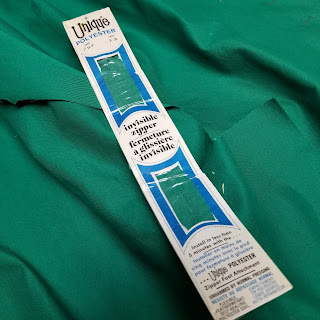
I happened to find a vintage invisible zip in my stash in "Jade", almost the exact colour of the skirt. And I finished off the waistband with an invisible skirt hook and eye rather than a button. It's very sleek and clean, and I like it that way. 

I used a remnant of plain cream lining rather than matching the polka dot lining of the jacket, just because the dot lining is a bit staticky and this leftover bemberg lining is not. It all seems to go together to my eye, and I'm very pleased with it! The fabric is prone to creasing though - you can tell in these pics which were taken after wearing the outfit for a few hours.


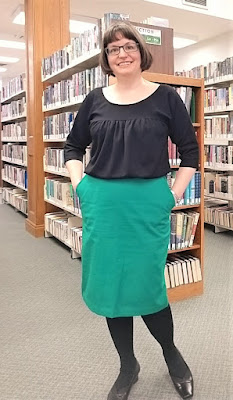
I'm working on a black blouse to wear under it, and already have my eye on some textured yellow cotton in my stash for another bright skirt suit. I'm afraid this is going to be addictive!

Tuesday, November 16, 2021

Burda Skirt in Magenta


Another brightly coloured piece to add to my bold and playful Fall sewing plans! I had this piece of magenta suiting from a thrift store trip, just enough to make a skirt. I chose Burda 127-09-2011 since I love a good slant pocket on a skirt, and because it fit my yardage! (as an aside: this nice pocketed pencil skirt pattern is hidden away in the magazine, only shown under a baggy long jacket with weird folds, it doesn't get highlighted at all in the issue. But it's a nice one!)

I also had this beautiful lining in my stash, just enough and a perfect match. So I got busy and cut this out. Then didn't work on it for nearly a month... But I've now completed it, and it was an easy sew that can be made much more quickly than I managed this time. Hey, I got distracted by other projects! 

I made a couple of minor changes to this skirt. I cut 42 at waist and 44 at hip, as I found my last Burda skirt quite large at the waist. I also made the waistband wider (cut two and stitched together rather than folding one in half for a narrow waistband) and interfaced it with a heavier duty interfacing to help keep its shape. 

Otherwise I pretty much followed the instructions. There is an underlap at the back waistband for a hook and eye, and the zip finishes at the bottom of the waistband, my preferred style. I also added the lining the same way that I did for my recent checkerboard skirt - even though it means a bit of extra hand sewing I feel that the neat finish is worth it. 

This skirt has a back slit, not a vent, so it's much quicker to finish. But I think I prefer a vent as it's less revealing. I am planning to make this skirt again so might adapt that when I cut out the next version. 


The only other change I made was to stitch down the inverted pleat by about an inch to keep it from poofing out too much. Now it sits a bit like a dart, smoother right at the front. I wasn't sure about the front pleats, but I think I like them now that it's done. 

This was a nice project, no big trouble with it and a nice fit too. The only issue I had is that this is hard to press and my hem is a  bit more rumply than I like. It's hand-stitched but I may have to unpick and stitch it to the lining to reduce the puckery effect. But now I need to get busy on the blouse I've planned in a matching dark floral so I can wear them together! So many projects I want to make... I'm sure you can relate. 

As worn today!

Friday, November 5, 2021

Checkerboard Print and a Burda Skirt


I saw a checkerboard print cotton at the fabric store a few months ago. It was in the craft canvas section, but it's a nice weight for structured sewing. So I immediately decided I'd make a skirt from it. It's only taken me about 4 months to get to it! I started work on this skirt and liked the fabric so much that I went back and bought another 1.5 m so I can make a matching jacket...hopefully it won't take another 6 months to get that done ;)

I used the Burda 109-11-2019 pattern that I made a first sample of in black in September. I saw from that make the changes I'd have to make to this one to get it right. There were quite a number of small changes that all together have improved the fit and finish of this one immensely. One of the details of the original pattern was adding D-rings to the waistband but I found it was too much with this print, so I left them off. An extra detail that I did add, however, was a line of satin piping on the pocket opening edges.

I found that I needed to take in the waist by nearly 3" on the original, so I made changes on the pattern, widening the dart intake and shaving 1/2" off each side seam. The fit is now really nice. I also completely changed the construction order and steps to finish this lovely lined skirt in the way I prefer to do it, not by the original Burda instructions which I found fiddly and messy. 

I moved the zipper down to finish at the bottom of the waistband, and added an overlap for a button to the length of the waistband. Zipping up an invisible zip through a sturdy, multilayer waistband is not my favourite thing to do -- it always feels like it's about to break. So I like a buttoned/hook and eye waistband instead. 

This meant that I had to change the lining attachment process as well. I put in the invisible zip, and before stitching up the rest of the skirt seam, I sewed the lining to the zip and flipped it to the inside. Then I baste the top of the lining to the top of the skirt, and sew up both skirt and lining seams below the zip. After I attach the waistband, I fold the inner edge down over the lining and hand stitch it. It might take a little longer but it is SO TIDY. I really like the smooth interior finish done this way.


Then it was just a hem and hand stitching the lining to the edges of the back kick pleat. I had to look up kick pleat instructions online for a refresher, and found a few new ways of doing it...I stuck with the classic here, but there are some neat options for future I'm going to try. Always something new to learn. 


I love this skirt! It turned out like I imagined it, and I'm really looking forward to making the jacket because a matched set in this print is going to be wild. I have lots of bright jackets to wear this with already, including this red one that really shouts 80s in this combo, to me. That's a plus, by the way ;) 

One more piece done in my "Bold Playful Power Suit" wardrobe theme for this fall. 

Tuesday, October 5, 2021

Burda in Red


I decided to participate in Pattern Review's September mini wardrobe contest, and so made two skirts to go with the black and white tops I was making. I had this red ponte in the stash and realized it was the exact red of the print in my Kirsten tee. So I chose a Burda skirt pattern from 1992 that I'd been wanting to try, and made it up. 


I made a few changes since the pattern was drafted for wovens. I cut a 42 instead of my regular 44, and I left out the back kick pleat. Not really necessary with the stretch in the fabric, and the length (I made it a touch shorter than intended by the pattern). 

It has slant pockets - my favourite kind - and an elastic waist. I used some random red poly lining material from the stash for the interior of the pocket, for its lightweight nature and how soft it feels. 

The waistband has two channels for 3/4" elastic and honestly it was the most aggravating part of the whole process. Pulling elastic through those small channels of heavy material was very laborious, and my safety pin opened halfway on the first go and I had to wiggle the whole thing out, arghhhhh! Anyhow, I finally finished it and think it's pretty good overall.

I am reminded that I don't love elastic waists like this, as they add bulk to my waistline which is already crowded into my short body. I like the skirt otherwise, and with a top over the waist (like the Rachel), or a belt added, I am happy with it. I love the bright colour and this ponte should hold up for a while. I think I will get some fun wear out of this bright project. 


Friday, March 19, 2021

Retro upcycling: stash skirt to top


Today's project is a quick refashion -- well, sewing it up was quick, although it's been cut and in my to-sew pile for months! I had a gathered skirt that I'd bought at a thrift store YEARS ago, because I loved the fabric. But it didn't fit and the style was just too old-fashioned. So I took the waistband off, and the gathered skirt turned out to be quite a large rectangle of this lovely drapy paisley print. But even a large skirt doesn't have tons of fabric, so a sleek top it would have to be.


I had this McCalls 4632 from 1989 in the stash, and thought that View F, the sleeveless one in blue, would be perfect. I was able to fit this onto the fabric neatly, cutting the hem of the top on the hem of the skirt, so that I didn't have to redo the hem but could use the pretty ribbon-edged one that already existed. This also made the project faster. 


Putting it together was fairly easy, with a couple of adjustments for my precut pieces. I sewed up the gathers and shoulder seams, then moved on to the facings. Because the front neckline is so closely fitted, there is a slash opening in the back and there are supposed to be a couple of buttons with thread loops. I was able to find an appropriate button in my stash, after auditioning about 6 varieties. They not only had to be smallish shank buttons which matched the fabric, I had to be sure they were very lightweight as well, since this fabric is very drapy and soft. I finally went with one button only, because I had this perfect choice but only one of them! 

Then it was a simple double fold hem on the sleeve openings, and I just double folded the side seam in the hem allowance and hand tacked it down, to keep things neat and tidy. And that's it! This pattern calls for shoulder pads, which I always leave out, but the fit of this one might just need some small ones. I'm thinking of adding in some 1/4" shoulder pads to hold the sleeve out a bit -- I think it'll show off the shoulder gathers a little better. 


This one is quite long, so looks much better tucked in, I think. Because it's just a geometric shape with no darts I think I could probably even wear it backwards if I wanted a front neckline slash tunic, though ;) I enjoyed this quick refashion and am happy to save this silky fabric and make into something wearable once more. 


Friday, June 19, 2020

Sewing Basics: a black linen skirt


Sometimes you just need to make a basic! I needed a summer skirt in basic black, and looked through some of my patterns for what I wanted. I found Butterick 6670, a wardrobe pattern, with a cute skirt included. It's a grosgrain faced full skirt, with side zip.


I found a black linen in my stash that I thought would be perfect -- it was a bit see through, however, so I lined it. This meant that I could stitch down the grosgrain facing. I *could* have just sewn on the lining as the waistline finish, but I had a very fun piece of leopard print ribbon in my stash that I wanted to use to spark up the project, so I basted the skirt and lining together and faced it with the ribbon.


This was a quick and easy project, and the linen was lovely to work with. So much so that I used the rest of the yardage to cut out the top from this same pattern. Let's see how long it will take me to make it up!


It's fun to be able to use stash fabrics and notions, match them up with a stash pattern, and then end up with a very useful standard piece for your wardrobe. And I love lining a fuller skirt -- not only does it help with transparency, or with making it more trans-seasonal so that you can wear it with tights, it also gives a nice "swish" of fullness to the skirt.


And while we're talking about black basics, it's also good to remember the basic fact that Black Lives Matter! Read up on issues, read novels by Black authors that are full of joy, buy from Black business, and listen to Black voices.