Showing posts with label patternreview. Show all posts

Wednesday, February 15, 2023

Red Ponte Dress with a Twist


The PatternReview Sewing Bee is underway once again! The first round challenge was set as "Knit Dress with Twist". Since dresses are my most common project I knew this one was for me. 

I puzzled a bit over what twist to add to my dress -- should it be a physical one? A conceptual one? I came up with a number of ideas and sketched them out but they felt very complicated. And I wanted to only make something I could wear, no stunt sewing for me this time around. 

Finally I thought of an idea that would look nice and be wearable. I had some burgundy red ponte in my stash that I've been wanting to use for a while now, and some scraps of black ponte from a recent Burda dress. They came together with the simple silhouette of Cynthia Rowley Simplicity 2054 to make this dress. This was a perfect pattern to use as there were no bust darts or extra seams to worry about.

To create a "twist" for this project, I inserted a strip of black ponte into the front pattern piece. This meant that I traced off the front pattern piece and split it into 3 pieces, remembering to add seam allowance to all the newly created seams. I made the insert off-centre (one edge was centre line) and at a 3" finished width, and added my twist feature to the insert. The twist is made with strips of the burgundy ponte, simply twisted once around at one end, and stitched down. The funny thing is that they are kind of like a mobius twist - I discovered that they can change the twist direction without my input. 

The other changes I made were to add pockets, using a cotton broadcloth. Using a woven for pocket bags helps to reduce stretching in the pocket area, I find. I also added 1.5" to the hem-- and I am quite short. This is a shorter dress as designed but I wanted it at knee length. I'm not much for short skirts! 

I really like the effect of the colour blocking in this dress, and it definitely wasn't one I was expecting to have in my closet prior to the Sewing Bee! This dress was enough to put me through to Round 2 of the Sewing Bee...and the challenge is Collars. And that's what I'm focusing on this week. We'll see how it goes!

Tuesday, May 10, 2022

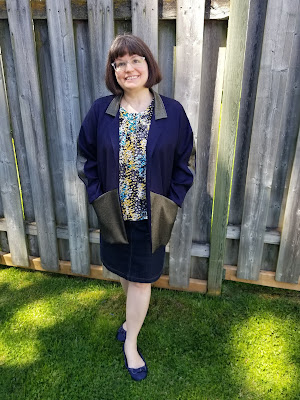
My Kyiv Jacket: Jalie Tania in blue and gold

Well, I made it to Round 3 of the Pattern Review Sewing Bee! This is farthest I've ever gone in this challenge, and I'm enjoying it so far. The challenge set was to make the Jalie Tania coatigan, and make it your own. I've made the Tania previously, so didn't have to do much fitting or tracing, which was a definite benefit as the week-long sewing challenge fell on a week in which I was very busy and short of time. 

I ran a number of ideas through as possibilities, until I finally decided on making a lightweight coatigan from some navy and black wool challis in my stash. I was taking Kyiv as my inspiration: it is sometimes known as the City of the Golden Domes, and so instead of the bright yellow and blue of the Ukrainian flag, I went with navy and gold in a nod to both. 

I cut my navy wool, and the gold lining I had in mind. I was planning on doing some embroidery and/or stencilling in gold, but when I was making samples I just couldn't get it right. It all looked too "homemade" and not what I was going for. So I decided to make a change.


 I knew I had some gold-toned fabrics in my stash so got them all out and changed the lower part of the Tania. I decided on some bronzey stretch fabric so had to interface it with lightweight interfacing to keep it from stretching out. Matching up those "V"s meant some fussy hand basting to begin with, something I experienced on my last go-round when I was matching up piping points. This bronzey gold seemed to go nicely with both the navy and the more golden lining. 


But I still didn't think it was enough, it needed a little more design. So I made the interior of the collar also in bronze, to highlight it when the collar is turned down. And more importantly, I decided to make a slashed sleeve, both to show off more gold and as a tribute to the church domes that were my inspiration - the oldest churches in Kyiv were built in 1037 and kept getting added to up to the 1850s and beyond, so that stretch of years includes the European fashion of slashed sleeves and doublets somewhere in there ;) 


 I used a strip of 2.5" wide gold fabric, attached to the sleeve which was split down the middle (it's a symmetrical sleeve) with a 1/4" seam, and then folded back together with edges touching. It's stitched down by about 3" at top and bottom, while the middle is left to open and reveal the gold insert. 

This wasn't too hard to make -- the pattern is quite straightforward. I didn't have many fitting adjustments to make, both because I am a fan of the boxy shape, and because I've made it before. But all the additions and changes did mean I had to start over a bit and think about how to put it all together most efficiently. 

While I don't think this was really out-of-the-box or terribly unique (no real changes to style lines or overall appearance) I enjoyed making it. I was pleased with my inspiration, and was also happy to have been able to once again make the entire project out of stash materials. I knew that gold lining would have a perfect project some day!


Tuesday, March 9, 2021

Charm Patterns Harlow Pajamas, for the Pattern Review Sewing Bee Round 1


I was a little distracted by my original March sewing plans by the arrival of the Pattern Review Sewing Bee! It started a little later than usual this year, and I was paying attention but not necessarily planning on participating...but the first round challenge was pyjamas -- I've never really made a two piece pj set before, which was the brief for this round. Plus it had to be "uniquely you" in some way. 

I sorted through my pattern stash, and found that I didn't have any paper patterns in my extensive collection for a pj set -- a few nightgown patterns, but nothing like a classic pyjama set. Fortunately, I have many Burda magazines so looked through those, but ended up going with a free pattern from Charm Patterns, the Harlow Pajamas, a 30s inspired retro glam set that I'd downloaded and printed a while ago. 

I like this set, as it has a real vintage vibe (as to be expected from Gertie at Charm Patterns). It can be made in a luxury silky fabric for glam wear, or in cottons for a more casual pj vibe. I went with cottons from my stash.

To make this uniquely me, I used a cotton-poly sheet that I thrifted a while back; it has a brightly coloured alphabet print, and I knew when I saw it that I'd find a use for it somewhere. This was it! It's not too stiff, and sewed up into these pyjama pants perfectly.

It is faintly see-through, and I noticed that my usual seam finish (just pinking) would show through from the right side, that zig zag edge was kind of obvious. Although nobody but me would ever notice, it bothered me, and so I used my overedge foot & stitch for the first time and gave the seams a nice clean finish that way. With a good press they meld into the fabric much better and are not obvious to the eye from the outside. Very pleased with the finish, although it used MUCH more thread than a pinked edge ;)

Then I had to match the print with a solid top. I sorted through my stash for a few different options, but when I came across this bright green cotton lawn I knew that was it. The perfect colour, the perfect softness for pj top. I'd originally purchased it a few years back, to line a dress I was planning on making from a green & yellow cotton that was quite thin, but that's never materialized, so the pj top it was. 


There are a lot of nice details in this pattern -- a contrasting neckband from the sheet fabric, plus a belt, and then a decorative frog closure. All that contrast is very pleasing to my eye. The cotton lawn is beautiful to work with, so soft and drapy, and the alphabet fabric turned into a confetti of coloured bits in the neckband, also pleasing!

I cut a 10 in this pattern, but could probably size down slightly if I made it again. I like a loose pj but this could benefit from being just a pinch smaller, I think. I had to shorten the pant leg by 3", and would likely take 1/2" off the waistline rise next time just to make it perfect. I didn't have to adjust the top at all. 

I really like this set! It feels fun and beachy and colourful, and will be a great summer sleepwear option. Even if I don't move on in this year's Sewing Bee, this first round was a great challenge for me, to make something I've never tried before, and do it using some wonderful, fun fabric from my stash. I enjoyed the process of making this set, and will also enjoy wearing it in future. 

Tuesday, February 19, 2019

Revisioned PR Lillian Dress

I finished out my run in the PR Sewing Bee this year at Round 3 -- with this make. I'm not in the final round, in which the challenge is to sew something inspired by a superhero.... I'm kind of happy, as I got to use the last few days I had off work to catch up on all my neglected sewing of the last few weeks instead! But here is some information about this latest project, which, aside from the weirdly lit photos, I'm quite happy with.


Round Three of the Pattern Review Sewing Bee caught me a little by surprise -- a knit dress, actually the Lillian Knit Top & Dress designed by Pattern Review! -- that we had to make our own.


I puzzled over this one 'til my puzzler was sore. What to do? I printed out a few line drawings and started sketching. And kept at it for two days. Finally I came up with a concept that I felt excited enough about to actually get down to making.


I decided on another illusion style dress, this time trying to make an all-in-one dress that looked like separates. I dug through my stash to see what I had, as I've been trying to use my stash first in all my sewing this year, regular or competitive! Luckily I had an idea about using yellow (oddly enough, since it's my favourite colour I have quite a lot of it stashed!). I matched this solid yellow, repurposed from an old dress I made and didn't wear once (the StyleArc Cher Knit dress, in case you were wondering, which was a huge sewing fail) with a favourite floral, and then went with a black and cream microdot from a 6m. length I thifted last year for the final outer piece. 

I changed the lines of the pattern somewhat -- I cut a block from the bottom of the bib bodice feature to the hem and used those two pieces to create the illusion of separates under a cardigan. I cut the remaining side pieces and back from the black, and extended the sleeve to elbow length, also in black.

But I thought that it needed more definition so I added sleeve cuffs in the floral to extend the top a bit, and thought I needed more oomph at the neckline so quickly drafted a demi tie collar -- it only goes to the shoulder and is sewn in at the shoulder seam. It gives it a little more of the secretary look and defines it as a 'blouse' I think.


I added a few extras to the black section to get it looking like an outer cardigan as well, though it's all sewn together with regular seams in a dress. I made the black outer panels longer than the yellow inner panel, and added a wide band at the seam between them. I didn't think of adding the band until it was nearly done so I just handstitched it on top of that seamline, which was fiddly and also didn't give me the kind of smooth line I could have gotten if I'd inserted it right into the seam while sewing. But I still like it. I also added patch pockets at cardigan height, lower than I would generally.


I made the fit around the waist and hip looser as well, to look more jackety than fitted to the back like the regular dress would be. I think it works but I'd take a little swayback adjustment in and add a bit more width over the bottom next time.


Overall I quite like this one! I had fun looking closely at the pattern to figure out how to change it up, and was so pleased when I finally saw the seamlines to work with. If I had more time I might have redone a couple of things but I think the illusion works, and I had quite a fun time making it. I just wish it hadn't been such a miserable weather day so I could have taken pictures somewhere else than a greenish room at work. Oh well! I still like it.

This Sewing Bee has really challenged me with each round's project. I feel like my creative sewing mind has been stretched a bit. And you should definitely check out the Round 3 gallery to see all the other massively creative takes on this pattern as well. Lots of creativity going around! 


Tuesday, January 22, 2019

Sewing Bee Inspired Blackwood Cardigan


What did I just say about contests? Ah well, inspiration struck this time, so I've ended up entering the first round of the PatternReview Sewing Bee (along with 117 other sewists!). When I saw that the challenge was to make a cardigan, I knew I had to try, but it was only when I finally found the perfect fabric halfway through the week that I decided to go for it.

The challenge was not just a cardigan, but a cardigan inspired by the Pantone Colour of the Year, Living Coral. I finally came up with a concept after a few days of mulling it over. Here's what I wrote about my inspiration on PatternReview:

When I first saw the challenge I wasn't sure I'd enter as I couldn't come up with a good concept. But when thinking about coral, and about the description of the colour at the Pantone website, the phrases "authentic, connection, intimacy" made me think of traditional Ukrainian korali, the multistrand coral necklaces often interspersed with silver beads or crosses worn by women in traditional costume. These necklaces were highly valued and every woman had one - the more strands the richer you were. 
This use of coral felt like an authentic connection to my own family heritage, and so I wondered if I could make a cardigan in the redder tones of most korali, with silver accents. I was fortunate enough to find a reddish poly knit at my local Fabricland with an embossed surface; the colour and the texture both remind me of coral. I used silver reflective piping in the front band seam to give a touch of silver to the cardigan, and then I found some silver buttons with designs that look very much like the kinds of beads and crosses in these necklaces so made a little feature of them as well. 
I feel like this is my Ukrainian style coral cardigan and am quite happy with the fit and the colour -- though not exactly Pantone 16-1546 it does give me a sense of connection and joyful pursuits as described in the colour write up! 


The pattern is the Blackwood Cardigan by Helen's Closet, a pattern that I had out and ready to trace anyhow -- because this contest challenge was something I was planning on making and know I will wear, I went ahead with a different colour and fabric than I'd intended for it first. I only want to enter in to contests or sewalongs that fit in with my already scheduled sewing, otherwise I find they kill my joy in sewing. So this one was fortuitous.

The fit is pretty good, though the sleeves are quite narrow, not really great for layering over anything else that is in the least bulky. In my next go I may enlarge them slightly around the upper arm in particular.


I used a different fabric than recommended; this one is a lot sturdier and much less drapey than the recommended knits. But I love the way it turned out -- it's like a cozy sweater cardi, perfect for the cold weather we're having currently. Though I don't really recommend standing outside in a snowstorm for very long only wearing this! It was rather blustery on Saturday but I had to get some pics to enter the contest so out we went. 

I'm wearing it with my own coral necklace I bought when I visited Kyiv about a decade ago. I think it pulls it all together quite nicely. I do like the cardi, and I really like how I was able to take my vision of something that coral means in my life and turn it into this project.


Warm, cheery, and personal. What more can we ask of our sewing?

Sunday, September 17, 2017

When I Put My Red Skirt On...


I recently made a bright red pencil skirt, inspired by the first week of the Pattern Review Sewing Bee. I didn't have a pencil skirt on the sewing list for fall, and wasn't planning on sewing along for the Sewing Bee -- I don't do so well with time limits -- plus I have a sewalong of my own on the go right now ;)


But the challenge was to make a pencil skirt inspired by music, and as I read the rules, a song by a group I've recently been listening to a lot popped into my head. Rosie & the Riveters are a vintage-folk band from Saskatoon, Saskatchewan (close to my hometown) who are both fun and socially aware, not shying away from stating their feminism in their songs.

The particular song that jumped to mind when I saw this challenge is called "Red Dress". It's a peppy song about the confidence that comes from wearing the perfect red dress, in this case, a gem found at 'the Sally Ann'. Since I do most of my clothes shopping either in the fabric store or the thrift store, this one really speaks to me. And the tune is great too! Listen to it in this music video the group made -- you can find many more on their website.


Anyhow, I spent a full day going through my pattern and fabric stash, trying to decide what I should make for this contest. I finally decided on the wardrobe pattern Simplicity 1919 because of the skirt's cute ruffle at the back which acts as a walking pleat. Then I matched it up with some heavy red stretch fabric in the stash which I had originally bought with Jalie's Eleonore jeans in mind... but I so rarely wear pants I thought I would use it for this pattern instead.


side view of the substantive ruffle!


It worked, but the fabric is quite stretchy -- more than I'd anticipated. I had to take the waist in even more than I'd originally decided. It's still a bit loose but wearable, so no big deal. I think the rest fits well, and smooths over most of my lumps and bumps, even if the heft of the fabric gave me a little trouble with getting clean seams (it's not easy to press this). I'm going to show you two unflattering pictures just so you can get a better idea of how this turned out.... oh, the sacrifices sewists make.


Not sure why the zip is bumpy in this pic, it is smooth while I wear it. Despite the flaws, I love this deep red and find it really fun and comfy to wear. I think it will go with many neutral tops and be something I can wear nearly year round, with the addition of tights.


So although I had no plans to make a skirt, this has now started me off on all sorts of ideas for other patterns I'd like to make -- after all, I think I looked at every skirt pattern in my stash before picking this one!

Coming up soon, I'll have a great pull-on stretch knit skirt in this year's velvety fabric ready to share; I'll be refashioning a velour maxi tank dress from the 90s that I found at -- yes -- the Sally Ann! Have you made any great thrift store discoveries lately?


Sunday, May 22, 2016

Pattern Review Weekend 2016: Chicago!

It's been a week since my first Pattern Review Weekend - which won't be the last! PatternReview is a long-standing sewing community, and one that I joined early on when I started sewing again. I enjoy the relaxed vibe and all the learning opportunities it provides. So when the 15th anniversary celebration in Chicago was announced I knew I had to go.

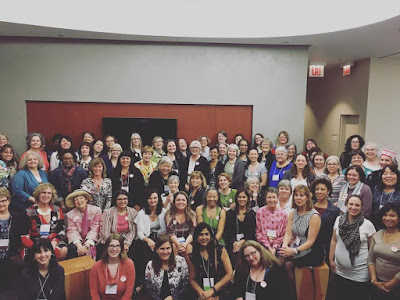
Deepika's iPhone snap of us all at PR Weekend

It was so much fun. Lots of fantastic people, good food and of course fabric shopping! It's the first time I've ever been to Chicago, so I really enjoyed the visit and the chance to get a good look at the city. We were staying downtown, so I got to walk along the river and see the Bean, and I took a short busman's holiday to the Harold Washington Library as well (in company with one of the other lovely ladies at PR Weekend). I'm glad I got to take a look; there is more about that visit on my book blog if you are also interested in libraries.
a

Many attendees made red jeans (that's what sparked my own Eleonores) and we were quite eye-catching as a flock of fabric shoppers :)  It was easy to pick one another out in a crowd.

The first morning we had a fascinating panel of Indie pattern designers -- Janet Pray, Emilie Fournier from Jalie, Jen Beeman from Grainline, and Angela Wolf -- talking to us about their work, and dispensing advice to those thinking of designing, which essentially seemed to be: know how to draft & design really well, and be prepared for lots and lots of hard work. I was really intrigued by all of their stories and the patterns they were selling as well. I feel like I know a little more about what my favourite indie designers are doing as they put out more patterns for us to try!

We also had a pattern swap that day, which I enjoyed...obviously....

I did buy about 10 of these...
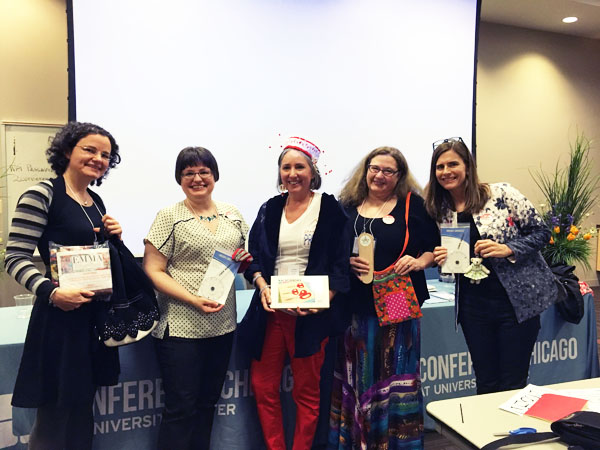
 And we held an accessories contest. I made my first pair of gloves ever, using Butterick 6264. One of the challenges in the contest was to incorporate the number 15 in celebration of the anniversary. I immediately had an idea for a decorative motif using the roman numerals for 15, XV. And I used scraps of a deep red ponte from this Vogue 9022, along with a contrast leopard print from this Butterick 5923. This was the result: I  call these my Roman Gloves.


And luckily enough, I won one of the prizes for my gloves! I now own a Curve Runner, a cool measuring device that I'm sure will come in handy in future.

Deepika's picture of the 5 accessories contest winners
And then of course we had the shopping. I restrained myself somewhat, as the US exchange is pretty terrible for us Canadians right now, but couldn't help buying a few things! Most of my Chicago fabrics came from Vogue Fabrics - a huge and fabulous store. I also picked up the latest Threads and BurdaStyle there so that we had some reading material on the way home. I got one piece at the tiny, crowded Chicago Yarn & Button near our hotel as well.


And I picked up many bits of embroidery project materials as I went...oh, the possibilities.


The best part of the weekend was meeting all these fabulous women who I have only known online up til now. So great to talk sewing with people who are actually interested ;) Can't wait til next year's PR Weekend.

I'll leave you with a photo that isn't exactly sewing related but was one of my favourite street view snaps I took on the walk over to Chicago Yarn & Button. I feel like it says everything.

Wednesday, May 11, 2016

Jalie's Eleonore Jeans

Pattern Review weekend is nearly here! Eeeek! As it is my first time going, I'm feeling pretty excited about spending a weekend with other people who are as obsessed by sewing as I am... and I'm sure my non-sewing friends will be glad for a break :)


As part of #PRW2016 the communal pattern chosen was the Jalie Eleonore pull-on jean. Since it was easily available in pdf form, I quickly bought it and went shopping. The other element of this group project was to make these jeans in red. So when I found a cotton/linen/spandex mix on the sale table (for $3/m!) I bought it.


Then I washed it, and found out why it was on the sale table...it bled and bled. 8 washes later, I said good enough, and will just wash these alone by hand every time I need to in future! Other than that, the fabric is great - nice stretch and a nice linen-y feel.

this is such a weird angle! I don't know how my leg seems to have folded like a paper doll...

This pattern is really straightforward. Easy to trace out - I used size X for the body, and then curved into a smaller W at the waist -- my inseam is so short it ended up at size P! But it was easy to adjust. You might note that these pants relaxed a little since I sewed them, and now I think I might have to hem them up by another 3/4" or so...maybe I will.


The pockets were interesting - I tried out a few of my Janome's decorative stitches for the first time. I went with the starburst stitch, even if it doesn't stand out much due to the matching thread. That's okay because no-one's going to get a look look at them anyhow...except for you and the internet. I had to topstitch a double line as I was too far from the edge the first go- in this case it is great that the thread blends in.


These were really comfy to wear, and they are really fun, too. Eye-searing red for the win! I would never have tried a pair of pants if not for the impetus of PR Weekend to influence my pattern purchase. And I certainly wouldn't have chosen tomato red for my first try :)


But I love them and I see how I will get a lot of wear out of these. I am going to make others in other colours -- I can't wear RTW capris in the summer as the length of them makes them look more like flood pants on me, so now I have the power to make some of my own! Not too bad for my first try at wearable-in-public pants. I'll wear them in public -- with long shirts but still. A change for me!


random shoe shot