Showing posts with label jacket. Show all posts

Wednesday, February 8, 2023

Yanaka Jacket in Scrappy Remnants

I've been wanting to make a Yanaka jacket for a while! I love the silhouette and the relaxed design; cropped or shorter jackets usually look best on me so I knew I'd have to make this one. I considered making a quilted jacket, but realized that a simpler print mixing version would suit me better. This project was made for the Liesl & Co. Ambassador Circle but was also inspired by the PatternReview Print Mixing Contest that ran in January (and if you're a PR Member, you can still pop over and vote for my jacket until Feb 10 if you'd like!) It will be shared on the Liesl & Co blog shortly as well!


This is an ideal pattern for print mixing or colour blocking, as there is a centre back seam, sleeve gussets and facings that can show if you fold the collar down. Lots of opportunity to use smaller pieces and show off those pretty leftover bits. And I have lots of pretty leftover bits! I use a lot of cottons and linens in my sewing so I got out my scrap bins and pulled out some of the larger remnants. I trialled a bunch of different combinations but finally decided on five floral prints that all fall within the same colour tones and scale. One of the prints (on the sleeve gusset) was just a cotton from my stash, but the other four prints werer remnants from other projects -- Butterick 6725, Butterick 6655 , the Itch to Stitch Celeste, and the Sew Different Harmon Top


I came up with a placement plan, but these fabrics were all fairly light/fluid. The Yanaka pattern recommends a medium to heavier weight fabric to support its shape, so I interfaced all the pieces with a medium weight fusible interfacing before starting construction. I knew that the standing collar, the front points and that wee back notch needed to be sharp, not floppy. Interfacing them prior to construction allowed me to use these particular scraps.


I didn't make many changes to the actual pattern. But there were a couple. I shortened the sleeves, actually by a little too much. In the end I didn't want to take any length out with a wide hem, so I made a 2" wide sleeve facing out of the cotton I used for the sleeve gussets (these were non-interfaced) and hemmed the sleeves that way. This also gave me a clear surface to stitch the lining on. I've added back some of the length to the sleeve pattern so I don't make this mistake again.


And I did also make a lining for this -- the jacket pattern is unlined, but with all my interfaced innards I wanted it all covered up nicely. Because of this I finished all my seams with a quick pass of the pinking shears since they'd end up invisible anyway.  I added in a 1/2" centre back pleat to give more movement room, and the lining was also a scrap!


The most notable change I DIDN'T make was that I did not shorten the body of the jacket at all. I almost always shorten above the waist but this time I liked the finished length and didn't want this to be too cropped, so left it as drafted. I really like how it turned out! It's really comfortable and the fit is great. I love the chance this pattern offered to use some of my beautiful print scraps to make a one-of-a-kind jacket. The lines of the design are just made for it!

Friday, July 15, 2022

A Warm Weather Yellow Jacket

This is one yellow jacket that I am not annoyed by! I used most of the remaining cotton sheet left over after my recent Simplicity 9115 makes to whip up this cute little bolero jacket from an 80s pattern. 


This Butterick 4969Butterick 4969 is from the late 80s by my best guess. I bought it for this jacket pattern; it's unlikely I will make a sundress. 


It was a fairly easy project -- front & back with collar & facings. I neatly finished the seams & facing edges since they are visible on the inside. 


The interesting foldback collar is a collar band connected to the facings & front pieces.


Then it was just on to hemming! The pattern suggests a blind hem & I did think it would look nicer with the clean edges of this little jacket. So I got out my blind hem foot & hemmed both the bottom & sleeve hems. I had to unpick the first bit as I made a bit of a mess until I got back into the rhythm of this foot.

I really like the look & the fit of this little piece. It goes well with my recent Burda dress & I am sure that other items in my wardrobe will match up too. That's pretty much the end of my big yellow sheet now! 


Tuesday, April 26, 2022

Burda Book Jacket

Well, I was fortunate enough to move on to the second round of the PatternReview Sewing Bee this year, and was also fortunate that I had the week off so I could work on my new assignment! I'm glad I did because it was a tough one. The brief was to create a garment in which the buttonholes were the feature -- not the buttons, but the buttonholes. Yikes! I was stumped at first.

I thought about it all the first day and came up with tons of different ideas, that were all rejected almost immediately. I researched various buttonhole techniques and ideas, and when I watched a Threads video on shaped buttonholes I was hit with the idea of making a "Book Jacket" - perfect for this librarian! It would feature open book shaped buttonholes. Once I had that thought I couldn't get rid of it, so spent most of the next day looking through my jacket & blazer patterns for a clean silhouette with buttons all the way up the front. Harder than you might think. 

But Burda came through for me again; I found the perfect pattern, 108 from 12/2021. It's a boxy style, and also had a coat variation (109). This was helpful because the collar on 109 had a wider gap at centre front, which I thought I'd need to accommodate my elaborate front buttonhole feature which required an extended placket to fit them on while keeping them centred on the centre front line. So I traced mostly 108, but 109's collar.

There are only 3 buttonholes, but laid out against the plain black jacket I think they stand out as the main feature. This is after all my Book Jacket, so my faced buttonholes shaped as an open book had to be the focus. To avoid disrupting the effect, I used the same text fabric for self-covered buttons (one of my favourite kind of buttons). While buttonholes for a jacket like this are usually horizontal, I had to switch mine to vertical to fit the book theme - the spine of the book becomes the buttonhole.


I made the buttonhole feature using a paper template I drew out, and was very careful to line the centres up with the centre front line. I don't always do a lot of thread tracing to mark centre front and button placement marks on a pattern, but I did here. On my samples I tried stitching the 'lips' to the facing to make a clean edged window, but I preferred the look of the topstitched window, as I felt it emphasized the book outline a little more. So that's what I did on the jacket. I put the buttonholes in on the right front pattern piece before I did anything else at all, in case I needed to recut the front and try again ;) Fortunately I didn't, so went ahead with construction.

I also decided to add in a little sleeve gusset at the wrist as a way to bring in the text fabric somewhere else in the garment. It's a little detail that shows when I'm moving.

I find the jacket comfortable and like it both done up and open -- I wasn't intending to ever wear it open, but the book effect still works when it's not buttoned up, and the counter effect of seeing the buttons separately actually adds to it, I think. I'm happy with the contrast between the black background and the book shaped buttonholes and text fabric. I enjoyed learning the shaped buttonhole technique and now have lots of ideas about how to use it in future projects.

Another element I liked about this project was that once again I was able to use stash fabrics & notions for the entire project, even if it meant I had to use two different types of lining for the body and the sleeves. 

The pattern included little patch pockets, but I didn't like them with this version - I was going for streamlined. So I didn't add them. I did shorten the sleeves (always) but not the body of the jacket. And my main change to the pattern (besides the buttonholes of course) was to extend the placket on the right side by 1/2" to accommodate the size of the book buttonholes. This was a cute pattern even with a few small issues with the instructions - it all worked out and I'm very pleased with this little jacket. The Sewing Bee really forced me to think about buttonholes in a new way! 


Tuesday, April 5, 2022

Cobalt Cropped Blazer: Vogue 8612


I've finished the first piece from my Spring sewing plans! This Vogue 8612 from 1993 was one I picked up at the thrift store specifically for the jacket. I doubt I'll make the jumpsuit, although the outfit as a whole is pretty cute! 


It's a particularly thrifty make: not only did I get the pattern at a thrift store but I picked up the wool gabardine via Our Social Fabric, an online thrift shop based in Vancouver. I didn't have quite enough blue fabric for the facings so used some black wool I'd picked up at a local thrift store. I was finally able to pair up a fabulous silky lining fabric I also found at Goodwill. I decided to use a covered button to finish it off -- also from a set from the thrift store! 


I enjoyed making this one a lot. I had to shorten the sleeves by 3" (short arms here!) and I shortened the body by 1", 1/2" above the bust and 1/2" below. If I make it again I won't shorten under, just above the bust point. The great thing about wool is that you can press out any bobbles pretty easily. Some steam and a bit of pressure (with press cloth) got those edges nice and tidy. 


Other changes I made: 

Added a 1/2" inch ease pleat to the centre back lining. While this jacket isn't super fitted, I do like to have that excess ease for movement in any jacket that I'll be working in.

I topstitched the edges rather than understitching the lining -- just couldn't see how I'd get a good line of understitching going after putting the shell and lining together. So used my favourite foot, the 1/4" quilting foot, to get a great 1/8" edge stitch. That is probably the most useful extra foot I've purchased. Great for edgestitching, topstitching and of course any random quilt piecing I might do. 


I finished the sleeve a little differently than the pattern called for, as I wanted a narrow hem. Just folded under 1/4" twice and stitched it down. When I move my arms you can get a little glimpse of the lining at the wrist which is pretty fun. 

And I think that's all! Sewing with this wool wasn't hard at all, and I love how I was able to shape the front seams smoothly with a bit of steam. I really love this combo of colours in this blazer and also am happy with my choice to use a matching button. Very pleased with this one. 


Tuesday, January 4, 2022

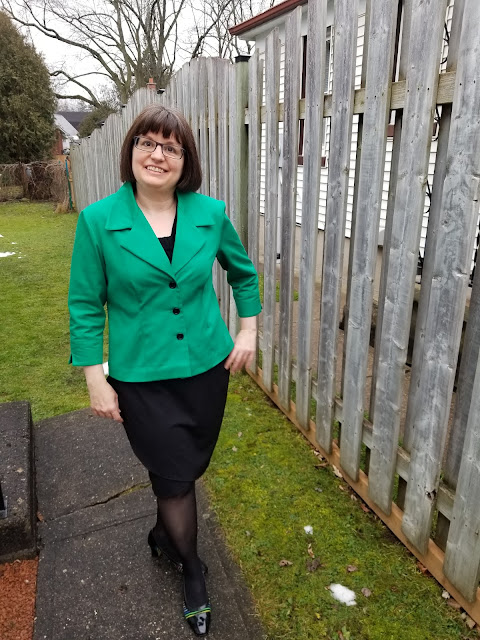
New Look 6159 in Dior Green


For most of December I was working on this green twill blazer, New Look 6159, for the #DesigningInDecember challenge (where you might still be able to vote for your favourites!). And also because it was on my sewing list as part of the Bold Playful Power Suit theme I created this fall.  This jacket was also inspired by the Dior Spring 22 show, all those bright skirt suits! 


I've never made a real blazer before so this was a learning experience. A real learning experience, as it turned into a bit of a comedy of errors with so many things going wrong right from the start. I got the pattern adjustments made and cut this out, then realized that I had somehow lost the second sheet of instructions for the pattern -- I have never lost anything from a pattern before. The instructions that I had stopped at the point where the lining was just starting to be constructed. Fortunately, I had this great book on linings in my stash, which gave me what I needed to get the lining in, alongside another book on tailoring that I'll talk about later on this month. 

I had a bit of difficulty getting the sleeves set in, which I normally don't have trouble with. I think that this fabric is a little sturdier and harder to smoothly gather, which added to the issue. I unpicked both sleeves at least three times before deciding that it was just good enough. When I got to the lining, which nobody will ever see, both sleeves set in perfectly the first time, smoothly gathered and with underarm and shoulder seams matched exactly. Sigh. I did shorten the sleeves slightly, since my arms are short, and I wanted this to remain 3/4 length. They are finished with a nice notched cuff which can be left down or folded up; it's a nice detail. 


This fabric resisted easy pressing as well, and I'm not 100% happy with the darts. They aren't terrible but could be better. The collar though, whew, that was tough! The point where the edges meet in that notch just wouldn't join easily. I unpicked both sides at least 3 times as well, and restitched carefully, turning it to see what it looked like. Finally, again I got to the 'good enough' stage, and just steamed the heck out of the collar at the end. It's actually the bit I'm most pleased with now. 


I chose a confetti print poly lining from my stash - a little more staticky than I like for a lining usually but I've had it a long time and couldn't resist the visual match. As noted that went together beautifully and sewed in with no issues at all. The pattern does include an ease pleat at the centre back so I didn't have to add one in.

It's actually quite a decent pattern; everything matched up as it should and I didn't have to do any extreme fitting. I did my usual length adjustments and then graded from 14 shoulder to 16 bust and 18 hip, quite common for me. The only unusual adjustment was that after shortening it above the bust and again above the waist, I added on 1.5" at the hem because I felt it was a little too cropped for my tastes. And I had to drop the dart points by 2" each. Also, when I tried the outer jacket on prior to adding lining, I thought that a 1/4" shoulder pad would improve the look of the fit, and it did. Good thing I had some in my stash ;) 


I finished it off with black buttons, inspired by Dior. That was another fun moment - I thrifted these perfect buttons and had carefully kept them on my table for this point in the process, and then couldn't find them when the buttonholes were to be put in. I was trying to finish this by deadline, and it was the afternoon of Dec 31 and there I was wasting time, turning everything over trying to figure out where the buttons could have got to. I finally uncovered them (under a stray pattern piece) and thankfully the buttonholes went in like a charm (I got to use my new buttonhole chisel!) and I stitched on these black buttons and still got to take pictures in the outdoor light. Yes, it was warm enough here on Dec. 31 that I could stand in the yard for these photos! 

I'm still planning on making a matching green skirt so that I can really knock off that Dior set. More on that later! For now, I'm relieved that I had the time to really work on this one and get it done despite all the problems I had with it. Hopefully next time I'll know a bit more and it won't take as long to make my next blazer :)


Tuesday, December 8, 2020

Cropped Jacket: Burdastyle Course final project

I finished my last project for the Burdastyle Teacher Certification Course this weekend and am happy to say that I am now a Burda Certified instructor. If I wish to start teaching, that is; at the moment I find my full time job busy enough for me. 

But I'd really wanted to do this course for a while, and since my One Word for the year was "Complete", I am really happy it helped me to finally complete this course. Of course 2020 threw us a few curveballs, but at least this was an online course and seemed like a good fit for life currently! 

My final project was the Burda 109 08/2015 cropped jacket. Funnily enough, this pattern is from the very first issue of Burdastyle magazine I ever bought myself, while on vacation in Montreal -- it's in French, too. I recall seeing it at one of my old hangouts, Tabac Etc. at the Atwater Market, and deciding that it was time to give Burda a try. Of course it's taken me five years to make a jacket from that issue! 

Anyhow, on to the sewing details! It's a cropped, fully lined jacket. And it was surprisingly straightforward to make. I cut it in 42, which fits my shoulders best, and hoped it would fit well enough all over since it is a straight cut, and only just to the waist. I shortened the sleeves by 2" because I thought they would be too long, and I prefer a bracelet length. I also shortened the body by 1" after my flat pattern measurements.

I really like the fit, but if I make it again, I don't think I'll shorten the body, and adjust the sleeve to only 1" shorter. I don't usually have issues with things being TOO short for my petite frame, and I do like this jacket version. But I think a slightly longer one would be just that much better. 

The fabric is a linen/rayon/cotton blend from the drapery section of my local Fabricland, which I bought a few weeks ago. It was a remnant and I had just enough for this jacket (another reason I shortened everything slightly!). I used some black bemberg lining from my stash as well. This is the first time I've done a full lining in a jacket and it went fairly well. I really like the instructions for a centre back ease pleat, and it makes wearing the jacket quite comfortable.

A single clasp at the neckline is an optional feature of this pattern, and I had a silver one I was going to use, but in the end I didn't think it looked right, so left it off. I'll be wearing this open over a dress nearly always anyhow! 

There was nothing too hard in this pattern, and I think adding a bit of trim or mini patch pockets could give you a Chanel feel pretty easily. I'm pleased with the final product (and I so love houndstooth!) and I think it could be changed up to give a different look without much effort. A winner for me, and a great finish to an interesting and useful online class. 


Tuesday, October 1, 2019

Tania Coatigan in Cursive


My latest Fabricville blogger project was a bit of an outlier for me. But I was making it for the latest edition of the Fabricville newsletter, and the theme was Fall jackets.

I don't often make outerwear or even blazers, but I was looking for a fall jacket/sweater, and the first thing I thought of was the new Tania Coatigan by Jalie. This jacket-like cardigan without front closures is perfect to throw on over a dress to look instantly chic and keep yourself warm in the chillier days or nights of fall! It has the addition of angled seams and clever pockets for that extra appeal.


The recommended fabrics for this pattern are stable knits or linen; it gives different looks depending on the fabric you choose, from casual to dressy. The pattern also recommends that you use your high bust measurement for a fitted look, and your bust for a looser fit. This opens up so many options!

I’m a librarian and I love sewing with unexpected fabrics, so I really couldn’t resist this cotton drapery fabric - PK Studio Cursive Caps - from Fabricville for my choice for the Tania! Look at those beautiful cursive letters – I can’t wait to wear this to work.


Although not one of the recommended fabrics, it is fairly lightweight without any special coatings or treatments that can sometimes be found on upholstery fabrics. Thinking about the characteristics of the fabric, the drape, the weight, scale of the print, and so on, is vital when deciding to use an unusual fabric choice for any pattern. Think about the lines of the pattern and whether the fabric you’ve chosen will match with that. For example, this fabric wouldn’t work for anything full or gathered, but it works amazingly for something fitted, with structure.

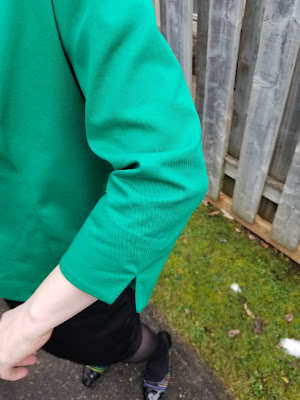
These back seams are perfectly straight when this is hanging on a hanger; there is slightly
too much fabric in the upper back for my body & so they curve out when worn. Sigh.

I made very few alterations to the Tania. Jalie’s patterns are always very well drafted. Because I’m only 5’2”, I did shorten it slightly above the angled seams, and shortened the sleeve length by a couple of inches. I also increased the bicep of the sleeve by 1.5” because my fabric doesn’t have much give and I often find Jalie sleeves narrow for my body normally anyhow.


I made a few cosmetic changes too: to accent those angled seams I inserted some satin piping that I also found in the upholstery department! It took a little extra time and hand basting to ensure that the points matched up at the seams but it was worth it. Because this drapery fabric tends to fray easily, I also took the time to bind all the seams with seam binding tape. This was the lengthiest part of the process! So much pinning and careful sewing. And I finished the edges of my facing with some bias binding for a tidy and attractive edge.


Other than those changes, this was a quick sew, perfect for the enthusiastic beginner on up. This pattern has potential for many different versions. When I make it again, I’ll probably use a knit, and one change I’ll make is to make the body one size smaller for a snugger fit. After wearing for a bit, I find that there is a lot of volume in the lower back for my body so will just take it in a little at the centre back seam to adjust for that too. A great pattern and a wonderful, high quality fabric with a print that I love make this into a hit for me!


Monday, October 7, 2013

Through the Wardrobe, Part 1

In August I joined Sewing Pattern Review -- it's a great website for anyone who sews. Really helpful and inspiring!

In September I participated in their monthly sewing challenge, the Mini-Wardrobe contest. The challenge was to sew 4 items that could combine to make 4 different looks. I'm a basic level sewist, but I thought it would be great to challenge myself and see if I could make 4 pieces of clothing in one month.

The contest is now closed, and my entry is posted there -- I actually finished!! I had a lot of fun doing this, and learned quite a lot. It was also great to get into the habit of doing some sewing regularly. Here are the first two of four pieces I chose -- part 3 & 4 coming up tomorrow:


Photo

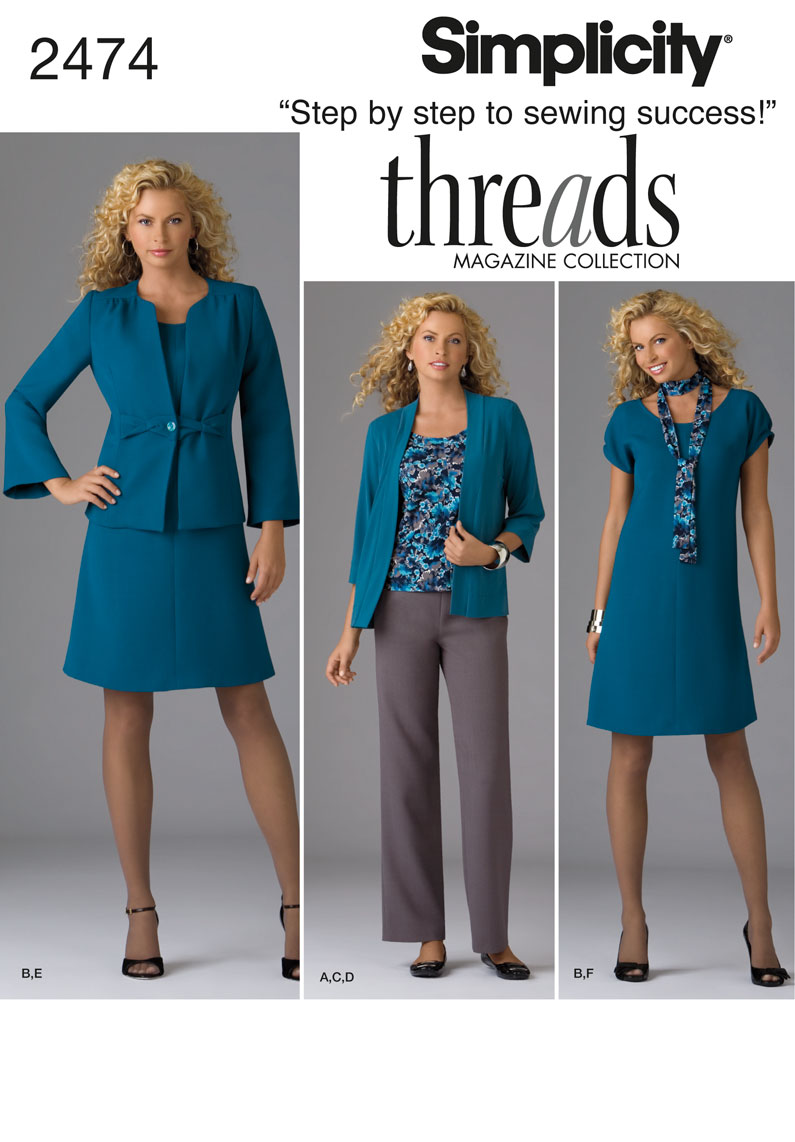
I have owned this pattern for a long time, and decided to make the dress and knit cardigan from this wardrobe. I had a lovely turquoise-y knit in my stash so used that for the cardi, which I love -- I think it's my favourite piece. The problem however, was that I had already cut a long slash in the knit in preparation for making a wrap, which looked horrible, so I wanted to repurpose the fabric. Fortunately when I laid it out, I just missed the slash!

Doh! Big hole in the fabric!
Finished deal, with dress
Soooo soft :)
And then I made the dress from the same pattern, using this shiny print that has just the same tone of blue as an accent. I added side seam pockets and cut the front on the fold, taking in an inch at the neckline, but otherwise didn't make any alterations.

Straight up
With a belt


This was a great challenge, and I love these new pieces. These two were the "easy" ones for me, very few alterations and they sewed up pretty quickly with no major problems ( if you don't count the sewing on of sleeve bands inside out and the resultant unpicking and resewing as very major...)

Tomorrow: pieces three and four...