Showing posts with label floral. Show all posts

Sunday, September 15, 2024

Weekend Review: Stitched Textiles - Flowers


Stitched Textiles: Flowers / Bobby Britnell
Tunbridge Wells, UK: Search Press, c2013.
 128 p.

Another stitching book for my latest review -- this is one I got via interlibrary loan. I've read other books in this series and find them an interesting overview of one specific area of textile art. This particular one features flowers, and there are a few different ways that the concept is incorporated into this book. 

Flowers are just the theme; the book uses them to illustrate varied techniques and ideas. It's a short book but it is fairly comprehensive as an idea book. There are plentiful colour illustrations to inspire and quick mentions of many different ways to get flowers onto your stitched art. 

The book also has a section at the beginning about design, in which the author discusses and gives examples of keeping a sketchbook and drawing designs before stitching. I actually found this part a bit intimidating, as her sketches are beautifully made pieces of art in themselves, and I could never do anything like that. I don't have art training, can't really draw, and like textiles because I don't draw. My initial sketches for any plans I make are more like stick figure symbols to orient myself to where things should end up, not a piece of art ;) 


In any case, the book then shows one example of each technique - including dyeing, monoprinting, block printing, appliqué, foiling, photo-transfer printing, piecing and stitching. I have seen this all before, so there was not much that was new to me, although she talks about painting right on to Bondaweb before sticking it on to your work, with great step by step illustrations - I feel like I understand this concept now, which I was always pretty vague on. 

There are also five mini-projects shared to use some of these new skills on, things like a pincushion or needlecase. I have no interest in the projects but another reader might! I thought this was a good intro to some ideas for those new to textile arts, but I didn't feel like I got that much out of it. The techniques were interesting but I don't use florals much and also felt that some of the shared images were a bit pedestrian. So, not a big hit for me personally, but this is still a good series to begin with if you're just learning and you love the theme of the book you're reading. Maybe I'll try a couple of ideas out and see how they go. 


Friday, August 4, 2023

Fancy Pants!


Yes, indeed, it's a rare day here at Following the Thread... I made some trousers! 

This is not something I do every day. In fact, I don't even do it every year. I so rarely wear pants that I don't focus much on making them and figuring out all the fiddly pants fitting. 

But Liesl & Co had the Cannes Trousers as part of their recent pattern release, and so I wanted to give them a try as part of the Advisor's Circle. They take almost 3 m. as drafted (although I knew I'd likely have to shorten them by a great deal) but magically, just the week I was thinking about making them, I found 3 m. of floral rayon at the thrift store. So off I went! 

You can see this project and the details over at the Liesl & Co blog now, but I'll also share a bit here. 

They were pretty straightforward in design and instructions; as usual, the instruction booklet has great illustrations and step by step explanations. Despite all that, I managed to put the fly zip in backwards even after holding the pieces up to me numerous times. Argh! But other than the fly going the wrong direction, it's otherwise perfect, it even has a nice fly shield.


The other major change I made to these pants was to shorten them significantly. I think I took 5" out of the length (I am barely 5'2") and have a 2" hem. That's pretty much what I'd expected. I'm not sure that pants this long and full suit my short figure that well, but maybe with a shorter and more fitted top the balance will be a little better. 

To check the crotch curve and rise, I took a well-fitting pair of linen pants that I've had for years (they've lasted because I probably wear them once a year) and laid the pattern against them. I found that I had to add about 1/2" to the back rise and a slight bit extra at the crotch extension to match but that the two were very close. I used this as my quick fit process and went ahead - the rayon only cost me $2.50 so I was treating this like my (hopefully) wearable muslin. 


As it turns out, it worked pretty well. I do find that these pants are still a little close to the body for my liking in the back, but still wearable. The pattern has lots of interesting details like the pockets and pleats, and I thought that it was easy to put together, other than my mirrored fly error. 

The rayon is very soft and feels great in these wide legs, especially when a breeze is blowing. I feel like these are very much 1930s beach pyjamas, and they're very Agatha Christie glam. Still not sure I'll wear them too often, but at least I now have a pair of summer trousers that actually fit me, so maybe pants will appear more often in my wardrobe. 


Friday, July 14, 2023

My Antonia!


Oh my goodness, I love this dress! I have had this pattern for the Antonia Dress by Pattern Division for a while, and love the simplicity of it. I thought it would be fun one, and I had already traced and prepped the pattern pieces a while back. So I decided to cut it out last week while I was on a cutting spree ;) 

It has a front, back and facing pieces, with cut-on pockets. It was a breeze to lay out and cut, and took me 3 hours start to finish to sew it up the next night. I am a slow sewist, it would probably take others less time! Being such a simple pattern, I was unsure that the fit would be very good, or flattering. But I guess this one is that unicorn pattern, the one made just for my body, because the only alteration I made was to shorten it by 2" for an above-knee length on me. Even the cool little gathered back feature sits at the right spot on my waist, and this is an area I often have to shorten.


Did I mention I absolutely love it? The waist, pockets, shoulders, everything is just in the exact right spot. And the back feature is adorable. The back gather was the only "difficult" part, and that was only because I wasn't quite sure how to sew it up at first. But you just follow the seam lines marked on the pattern, it's kind of a wedge. I haven't made something like this before; the lower skirt is cut on the fold and upper bodice has a centre seam, but it's all one piece. It's pretty neat to see it come together. 


The facings are also very wide - I like this, as it keeps them from flipping out. Well, that and the fact they are also topstitched. There are the front yoke seams and the centre back seam to tack the facings down to as well, so altogether this is a very quick and efficient pattern without the feeling of a pattern that cuts corners. 


I used a cotton from my stash that has a bit of a sateen feel, but isn't too heavy. This worked well, even if you can't really see the gathered front shoulder/yoke or centre back features too clearly in such a busy fabric. I really love this and will definitely make it again! It also has a top length and midi length version in the pattern -- I might make a top, but I do really love this knee length dress and can see making a solid coloured version.


The pattern is named after the writer Antonia Fraser, since as the designer, Ann, states in the pattern copy: "I read that Antonia Fraser didn’t like to shop so she had her favorite dress made in different fabrics so she could wear it every day, every season… I loved that idea! This is my everyday, every season dress and I make it myself. "

A great pattern that I really enjoyed making - easy, quick, no closures, fun to sew up, and a great result. What's not to love? :)


Tuesday, March 28, 2023

Floral Set for Fabricville


My latest project for the Fabricville blog is a little different for me - instead of a dress, I made a two piece matching outfit! Now I have separates that I can wear together for the dress feeling, or break apart to wear in other combos. 

I saw this floral rayon online at Fabricville, but the online image was a bit deceiving -- it looked like it was all floral stripes, but when I received it, the stripes ran along either selvedge edge with the centre more of an open floral. If I would have looked more closely at all the images, I could have seen this ahead of time - but I didn't.  Fortunately the print and colours are very cohesive, but it did mean that I had to make some decisions about how to lay out my pattern and how to use the print effectively. I didn't want the wide band of stripes running horizontally at the bottom of the blouse so I held the fabric up to me and asked for some opinions and finally decided that the stripes would run vertically down the right side of the outfit. I usually tend to put decorative elements on the left so it surprised me that this just looked better to have the stripe feature on the right! 

This is a rayon voile, and it's very lightweight and shifty. It is super soft and smooth, and the colours are so wonderful bright and deep against the dark navy background. But it was tricky to cut since it is so slippery and light. I got it cut fairly well, but I am glad that the busy print hides any mild mismatches! 

The blouse, Butterick 6731, was not a complicated project. And I only made a few minor changes. I shortened the body by 1/2", but did not shorten the sleeves at all. I raised the point of the V-neck as I thought it would fall a little low on me, and I'm glad I did. I also narrowed the centre of the neckline and the centre back by 1/4" each. The biggest changes were with the back darts - I found them extremely long so pinned them in to test it out, as I did not think this fabric would appreciate any stitch unpicking. I ended up shortening the upper point by one inch and raising the lower points by 4 inches - I wanted to leave more room across my butt ;)  I then shifted the dart centre to just under halfway between, a touch closer to the lower point. That pulled in the excess across my back but left lots of movement across the hips. Because of this, I also omitted the side zip. I basted the side seam and tried it on to see if it would go on without a zip and it was very easy to do as long as I had the front ties untied. All in all, it took some fiddling but I really love it. It fits nicely and is a super soft and comfortable fabric to wear. 

I added a lightly gathered skirt, using a pattern from my stash, Simplicity 1542 (a pattern I actually bought for the jackets). I thought this skirt had the right shape to go with the blouse. I had to alter this as well; first to add some length to it (3.5") and secondly, recutting the waistband as it is designed to sit 1.5" below the natural waist. I prefer my skirts at my natural waist so altered it to fit at that spot rather than below.

I added a side seam pocket to the right side of the skirt as well - the left has the zip so I didn't bother fussing around with that. I'm right handed so the right pocket is the main one I use anyhow! I was grumbling about the wobbliness of the fabric while cutting and sewing, but I love how it turned out and think this will be a very wearable set. 

Tuesday, October 4, 2022

Stitchalong: Poppy finisher!


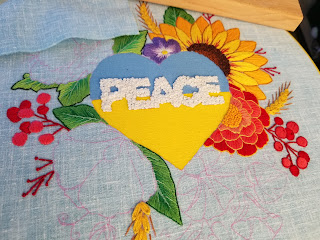
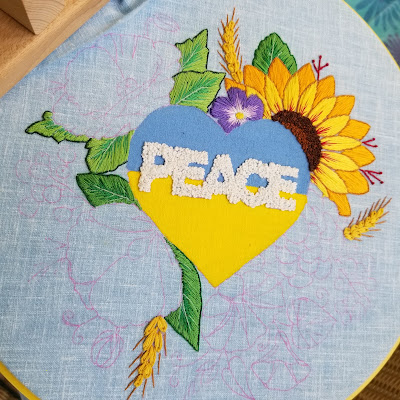
I did it! Finished my #PeaceForUkraineSAL, I mean :) 

I didn't get much stitching or blogging done for last week -- had so much to do. But I worked extra hard on the poppy over the last few days so that I could finish up and share the completed stitchalong pattern. (Designed by Nat, a Ukrainian embroidery artist found at EmbroideryArtByNat )


I started this last motif rather slowly, beginning with the centre and the little bud. I then moved on to the split stitch outlining, which took forever -- I'm not great with split stitch. Forgot to take many in progress photos with this one, as I had it set up in the stand and was just taking a few stitches whenever I could fit them in - photos slipped my mind! 

The poppy is then mainly filled in with four tones of long and short stitch. I looked at a few finished ones by others and realized I liked the ones with the lightest colour just lightly applied. So I tried my best to balance it so that the darkest red was most in evidence. Again I wasn't sure about it halfway through, but once the darker shading was in it looked good. And when the black was added it all came together for me! 


I left the poppy until last because I was worried about being able to do all the shading. But after all the practice on the other motifs I think it turned out well. All that's left is taking it out of the hoop and finding a suitable frame for it. This one is going into a proper glass front frame; I'll share photos once I have finished that. 

I have really, really enjoyed stitching this piece. I've tried to listen to Ukrainian podcasts & audiobooks, sometimes music, while I was stitching so that it would feel like it was a learning experience in all ways. I really love the podcast UkrainianSpaces and recommend it. And I've been reviewing some of the books on my book blog, with more to come, if you're interested. 


There are many other great patterns by this designer, I encourage you to check her out on her website and/or Instagram. This pattern is still easily available on Nat's website along with many others, both images related to Ukraine and many other floral and nature designs, too. 

And please keep paying attention to what is happening in Ukraine, and help where you can. There are many local charities that need our help. 


Tuesday, September 20, 2022

Stitchalong: Purple Morning Glory


This week's progress on my Peace for Ukraine Stitchalong is getting me so close to the end! I worked on the little purple morning glory on the bottom of the design, which I really like -- the shading was tricky here but has such a wonderful effect. 


I started with the leafage, which was done differently from the other leaves in this design which I did in a batch earlier. These leaves are a bit rounder and 'juicier' so were stitched in double strand, and outlined in one strand. Then it was on to the interior stripes.


These were slightly tricky to add in, and I had to add more to the centre of the five point star shape afterward, as I hadn't brought them in closely enough together. But I really liked the colours and enjoyed figuring this element out.


After getting all the greenery done and fixing the central bits, I stitched up the little cone shaped bud and started in on the dark purple shading. It always looks odd at this stage but once you start filling it in it all comes together. 


You can see that the first layer is quite similar in tone but then it lightens up quite a bit in the middle, finishing with some white highlighting that just finishes it off beautifully.

I love the way the shapes and colours blend in this pattern, and am eager to work on the final element, the poppy. I've been leaving this one to last since there is so much delicate shading in it. I'm nervous about getting it right! Thankfully I've had some practice now with the other flowers. 

It will soon be time for some framing decisions!


Just a reminder that this project is a fundraiser for Ukraine. There is still a war going on and they need our support more than ever. You can find this pattern on the website Embroidery Art by Nat, as well as suggestions of many ways to assist Ukraine. I would personally recommend UA24 or Come Back Alive as reputable places to donate (among many others) if you would like to give money directly to Ukrainian charities.

Tuesday, September 13, 2022

Stitchalong: Pink Mallow


Today's element of the #PeaceForUkraineSAL is the pink mallow flower. It's a big bloom, and adds some shiny pinks to the mix. There are quite a few different bits to this one: from the little bud done in satin stitch to the central stamen in french knots to the 3 layer long-and-short stitch that makes up the flower itself. And then all the outlines and little details. 

But somehow this one didn't feel like it took that long to me. I really enjoyed the repetitive nature of the stitching that makes up the flower. Like always, when you're at the first layer of stitching it doesn't look like much. But as you add in the colours and the petals fill up it starts to look really great. 


I probably could have extended the medium pink a bit further out into the petals, but I am happy with how this turned out. I like the mix of colours and think that the little details like the central cream and green streaks around the stamen add so much. The pale pink split stitch outline on the petals really makes it pop as well. I think it has a sense of a cupped flower with those details. 

I've really been following along with the pattern and not deviating much, and I enjoy the design and all the thoughtfulness put into the smallest bits to make them just so. All of the shading really makes the design, to my eye. Among the traceable patterns in the instructions there is also one with directional guide lines drawn in, and I've been using that one for this week's and last week's work in particular. To make the petal edges look distinct, it's useful to change the direction of your stitches, and seeing them sketched out in the pattern is so helpful. It saves time when someone else has already thought about and worked out the best placement for the effect you want! 


This flower is really lovely and I'm very impressed with the finished look. I wasn't fully sure I liked the pinks when I started but I love the finished bloom. Only two more flowers and then I will be done this project. But there's no limit on the support we can give to Ukraine. Victory to Ukraine!


Tuesday, September 6, 2022

Stitchalong: Oh the Red Kalyna!

This week I finished up the two sprays of kalyna berries on my #PeaceForUkraineSAL project. As always, you can find this design on Embroidery Art by Nat's website.

This element may look simple but it wasn't; it took longer than some of the larger elements! This is because the berries are all done in padded satin stitch. So, to make them you're basically stitching them twice.

I outlined each one in one-strand split stitch, then filled in the berry with rough long split stitches. I made the pad stitches at a 90° angle to the direction I wanted the final stitches to lie, since there will be better coverage if the stitches are sitting opposite - no creeping between as might happen if they were all lying the same way. 

Anyhow, after all that split stitching came the second layer of satin stitch in two strands. Each berry was finished and then outlined in stem stitch, and I added a french knot to each to give them that berry look. Most were fine but a couple of the knots slid down between two stitches so I added another one on top in that case. I just keep fiddling until it looks about right ;)

The stems were a nice quick whipped back stitch and I'm glad part of these two sprays was easy since I found this element very fiddly indeed! But I love the finished look and the pad stitching really does make them pop off the backing nicely. Next up, I'll be working on the pink mallow flower at the bottom of the design.

The instructions give a little bit of the history, legend and/or meanings behind each of the elements, and I think people may be familiar with the Kalyna (or viburnum) now that the folk song Chervona Kalyna seems to be everywhere. Today I'm sharing my favourite version: 


Tuesday, August 30, 2022

Marigold on my Stitchalong


More updates on my #PeaceForUkraineSAL project! This week's element is this cheery bright marigold. It has french knots, satin stitch and split stitch outlines. Once again there is some shading of a deeper colour in the centre of the petals, though it's quite subtle here. I love the effect of it each time it's used. 


There are three bands of colour, all kind of rosy coral pinks. After satin stitching the petals, they are all outlined using single strand split stitch. I find split stitch a bit wobbly but when I switch to split backstitch I get neater stitches and better curved lines. Either one is fine, I just find backstitch easier! (what's the difference between them? Great explanation at Needle N Thread)

The inner petals are done in the lighter yellow of the wheat stalks but when I got to the outer rings and the darker pink, I decided to switch to the slightly darker yellow that I used for the french knots in the centre of the marigold. I like the definition this gives, and it also makes the back layer of petals recede a little visually, which I feel has a bit more of a 3D effect. 


This element was actually pretty easy to complete, as it was mainly a lot of satin stitch, which I find quite easy to do. My french knots are getting better with all this practice too! Don't forget that this pattern can be found at the designer's website, Embroidery Art by Nat, and is a Ukraine fundraiser. You can find so many of her other beautiful designs there as well! 


Tuesday, August 23, 2022

Stitching All the Leafage


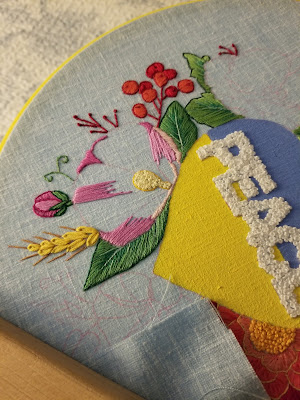
Really happy with how my #PeaceForUkraineSAL is progressing -- this is pretty fast for me ;) I finished up the wheat stalks from last week and moved right into the first leaf at the top of the design. it's done in a long and short stitch with some contrast for the veins and the shading in the middle, as well as an outline. I was quite pleased with the look of it and so moved right on to the Guelder Rose leafage at the bottom of the design.


That worked even better, now that I had practiced the technique on the first one! I really like how smooth and shiny these ones turned out. The edges were also much smoother than the first leaf so it was easier to get a sharp outline. Next up were the poppy leaves to the left.


These one are done in a lighter green, with a darker outline. I like the effect quite a lot, and find that the greenery all together adds some life and brightness to the design. I love the design of this project, there is so much smooth, full coverage stitching and it's really pretty. Can't wait to add some reds and pinks in next. 


If you're interested in giving this one a go as well, just a reminder that the designer is Embroidery Art by Nat and that this one is a fundraiser for Ukraine, with all the info on her website. You can now also buy the pattern directly on her Etsy shop if you wish, as well.

Thursday, August 18, 2022

Rayon A-Line Shift, from Stash

This little shift was the result of a quick turn after I'd gotten this fabric out of my stash with another pattern in mind. Unfortunately I didn't have as much of it as I'd thought, so a new pattern had to be found. I've had McCalls 6465 on my potential to-make list for a while, and since it uses a small amount of fabric I went with it. 

I also had a small piece of contrast black and white fabric that I'd bought at the same time so decided on View B, the version with a wide contrast hem band. While my contrast is quite subtle I really like it. 

I cut this in a size 14 at shoulders and arms, grading out to a 16 at waist and hip. Since it's quite loose and a-line I didn't add more to the hip measurements. 

I also added side seam pockets since I really don't like having nowhere to put my keys ;) This rayon is quite smooth and soft so was a bit tricky to handle but I went slowly and managed to keep most of the seam lines pretty straight. I wanted to be sure that the hem band in particular was even. 


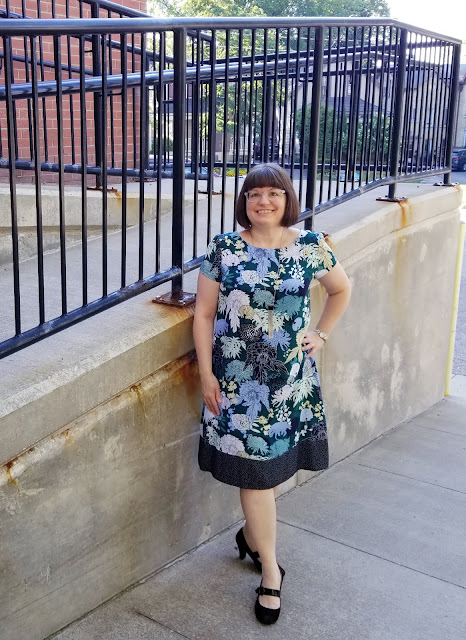
I'm moving away from florals in my fabric choices these days, but I still really liked this one since it was a more abstract, wild feeling floral. Plus it's all green, and I'm loving green these days. I'm happy to have tried out a pattern I've been thinking of for ages, and that I got to use this lovely fabric. I'm trying much harder to use up the pretty fabrics I own, so that they aren't just sitting on a shelf, but being enjoyed. Much more fun to have them out in the world!